Category: Recipes

  • Tteokbokki Recipe: The Broth Trick That Keeps It From Turning Gummy

    Tteokbokki Recipe: The Broth Trick That Keeps It From Turning Gummy

    Homemade tteokbokki fails in two predictable ways: the rice cakes stay hard or turn gummy, and the sauce comes out too sweet or too flat.
    Both problems come from handling, not luck.
    This guide covers the broth, the thawing step, and what to substitute when Korean groceries are out of reach.

    Contents

    1. Why homemade tteokbokki turns gummy
    2. The broth that carries the flavor
    3. Failure point 1: freezer-hard rice cakes
    4. Failure point 2: gochujang brands and sweetness
    5. Substitutions when Korean ingredients are hard to find
    6. Common beginner mistakes, in one place

    Why homemade tteokbokki turns gummy

    Tteokbokki is chewy rice cakes simmered in a gochujang sauce, and in Korea it is not a niche dish — a live listing tracks more than 4,600 tteokbokki restaurants nationwide, with at least 21 franchise brands running on it alone.
    That scale means the classic version has been standardized for decades, and the official reference from the Korean Food Foundation lists the same core set: garaetteok rice cakes, a gochujang-based sauce, fish cakes, and optional boiled eggs or scallions.
    The two texture failures beginners hit abroad come from the same root.
    Starch released during simmering thickens the sauce, and once the rice cakes overcook past soft-and-floating, that starch turns the whole pot gummy.
    The fix is controlling water, heat, and timing — which is what the rest of this guide does.

    Hard outside, gummy inside Rice cakes went in frozen or cold, without soaking
    Sauce tastes flat and starchy Plain water replaced the anchovy-kelp broth
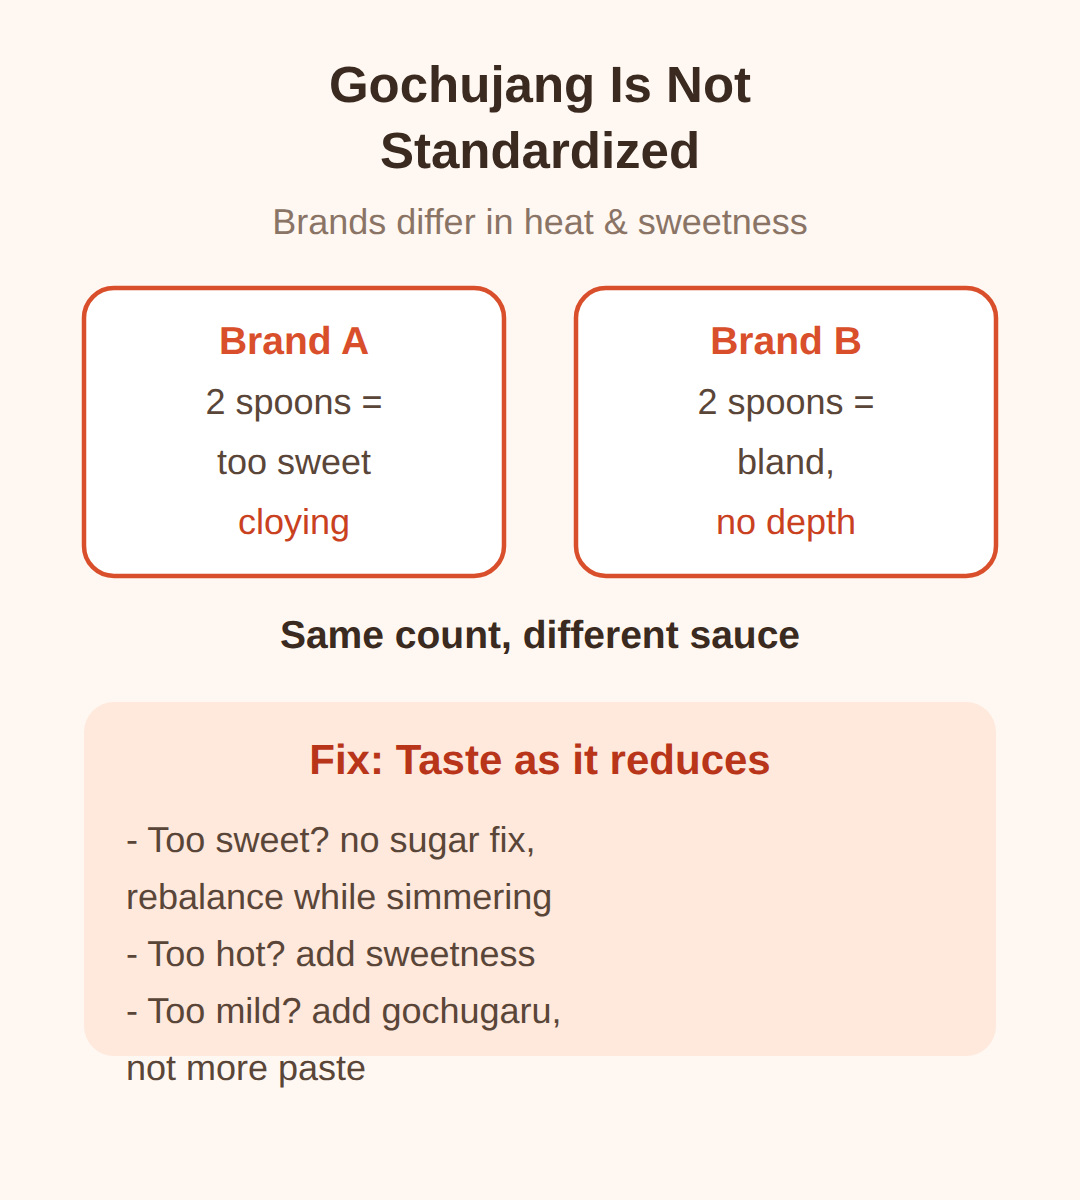
    Too sweet or too mild Gochujang brands differ in sweetness; the amount was fixed, not tasted
    Chewy turned to mush Simmering continued past the point the rice cakes float and soften

    The broth that carries the flavor

    The sauce base is not water.
    Korean recipe sources use a standard soup stock of dried anchovies and dashima (kelp), simmered for about 10 minutes before anything else goes in.
    Rice cakes release starch as they cook, and that starch needs a flavored liquid underneath it, or the sauce lands flat no matter how much gochujang goes in.
    Make the broth first, strain it, and build the sauce on top of it.

    Failure point 1: freezer-hard rice cakes

    Fresh and vacuum-packed garaetteok do not keep at room temperature, and freezing is the correct storage if they will not be used within a few days.
    The mistake is cooking them straight from the freezer or fridge.
    Hardened rice cakes need to be thawed and soaked in warm water for 10 to 20 minutes first, or they cook unevenly — gummy on the outside, hard in the center.
    Doneness is easy to check: the cakes are ready when they fully float and feel soft to the bite.
    Stop simmering there.
    Every extra minute past that point pushes the texture from chewy toward gummy.

    Failure point 2: gochujang brands and sweetness

    Gochujang is not a standardized product.
    Spiciness and sweetness vary noticeably between Korean brands, so a fixed spoon count that worked in one recipe can produce a sauce that is cloying or bland with another jar.
    Recipes from established Korean-cooking sources advise tasting the sauce as it reduces and adjusting with sugar or corn syrup, rather than trusting a fixed amount.
    The same rule applies to heat: if a brand runs hotter than expected, sweetness balances it; if it runs mild, add gochugaru rather than more paste.
    Failure point 2: gochujang brands and sweetness

    Substitutions when Korean ingredients are hard to find

    The ingredient most often missing abroad is fresh garaetteok.
    Dried rice cakes are the common stand-in, and they simply need a longer soak before cooking.
    Non-Korean rice cakes also work, but each type changes cooking time and texture, so watch the float-and-soften cue instead of the clock.
    Eomuk (fish cake) is a common add-in rather than a requirement — it cuts into pieces and simmers directly in the sauce, and leaving it out is fine.

    Common beginner mistakes, in one place

    Cooking rice cakes straight from the freezer or fridge is the first, and a 10-to-20-minute warm-water soak fixes it.
    Replacing the anchovy-kelp broth with plain water is the second.
    The third is simmering past the point where the cakes float and soften, which trades chewiness for gumminess.
    The fourth is locking in a gochujang amount without tasting, which breaks as soon as the brand changes.

    Related posts

    📎 Samgyetang Recipe Without a Spring Chicken: Supermarket Substitutions That Work
    📎 Kimbap Recipe: 45 Minutes, One Mat, No Special Ingredients

    Sources

    Storage and reheating

    • Leftover tteokbokki thickens as it sits, because the rice cakes keep releasing starch in the sauce.
    • Reheat on the stove with a splash of water to loosen the sauce, rather than dry in a microwave.
    • Unused rice cakes keep better frozen than refrigerated; thaw and soak in warm water before the next batch.

    FAQ

    Q. Should the recipe be adjusted for frozen rice cakes?

    The steps stay the same — only the prep changes. Frozen or refrigerated garaetteok needs thawing and a 10–20 minute soak in warm water before it goes into the sauce.

    Q. Can regular rice cakes replace garaetteok?

    Yes, but expect a different texture and cooking time. Non-Korean rice cakes vary in density, so rely on the float-and-soften test instead of a fixed simmer time.

    Q. How much sugar or corn syrup should go into the sauce?

    There is no fixed amount that works across gochujang brands, because sweetness varies between them. Taste the sauce while it simmers and add sweetener a small spoon at a time.

    The Korean Food Foundation’s hansik.or.kr hosts the official tteokbokki recipe and dish background in English, and it is the best page to check the classic ingredient list against.

    Cover photo: HK Korean food product 農心集團 Nong Shim Shrimp Snack spicy 28-May-2013 by Pamoa2553 — CC BY-SA 3.0

    #tteokbokkirecipe #tteokbokki #garaetteok #gochujang #Koreanricecakes #spicyricecakes #Koreanfood #easyKoreanrecipes
  • Bulgogi recipe: why Asian pear makes the marinade, and what to use instead

    Bulgogi recipe: why Asian pear makes the marinade, and what to use instead

    Bulgogi recipe: why Asian pear makes the marinade, and what to use instead

    The core bulgogi marinade is five things: Asian pear, soy sauce, sugar, garlic, and sesame oil.
    The pear is the part most home kitchens abroad struggle with, and it is also the part doing the real work.
    This post covers what the pear actually does, the ratio for 1 lb (450 g) of beef, four substitutes that work when no pear is on the shelf, and how to slice thin and grill hot on a regular stove.

    Contents

    1. Bulgogi recipe: what Asian pear actually does in the marinade
    2. The core marinade ratio for 1 lb of beef
    3. Pear substitutes: apple, kiwi, pineapple, onion
    4. No ribeye abroad: cuts and thin slicing
    5. Stove-top grilling: sear without charcoal
    6. Serving, mistakes, and the mushroom version

    Bulgogi recipe: what Asian pear actually does in the marinade

    Bulgogi is thin-sliced beef, usually ribeye or sirloin cut 2–3 mm thick, marinated in a pear-soy base and grilled fast.
    The name means fire meat, and the dish traces back to the Goguryeo-era grilled skewer called maekjeok.
    Today it is one of the most widely known Korean dishes outside Korea.

    The pear is not just there for sweetness.
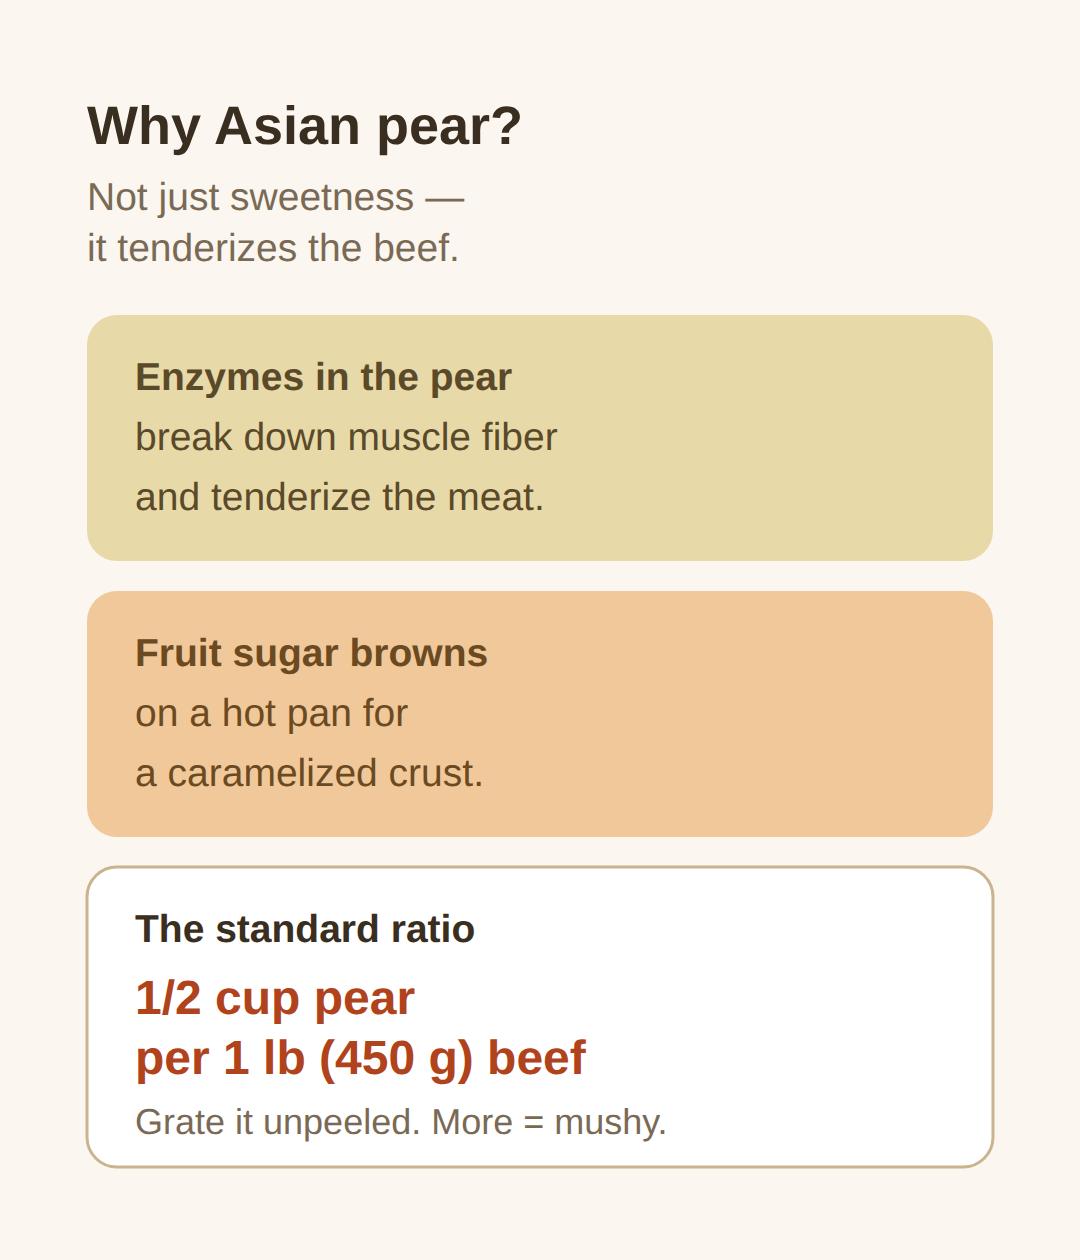
    It carries enzymes that break down muscle fiber and tenderize the beef while the sugar in the fruit browns on a hot pan.
    Grate it unpeeled — most of the tenderizing effect sits in and just under the skin.
    About 1/2 cup of grated pear per 1 lb (450 g) of beef is the standard amount, and more than that turns the marinade mushy-sweet.

    Regular brewed soy sauce works here.
    Soup soy sauce (guk ganjang) is saltier and thinner and throws the ratio off.
    A little grated onion is a normal addition alongside the pear — it adds sweetness and moisture, it does not replace the fruit.

    One practical shortcut: bottled Korean pear juice, sold as ground pear drink (galamandeunbae), can stand in for fresh pear at the same 1/2 cup per pound.
    Lemon-lime soda is a modern home-cook shortcut too — it adds sweetness and light tenderizing in place of part of the sugar.

    Grated sweet apple (Fuji) Same as pear — about 1/2 cup
    Kiwi Same amount, marinate 30 min max
    Pineapple About 1/4 cup (half the pear amount), under 1 hour
    Grated onion + extra sugar Same amount, no enzyme tenderizing
    Bulgogi recipe: what Asian pear actually does in the marinade

    The core marinade ratio for 1 lb of beef

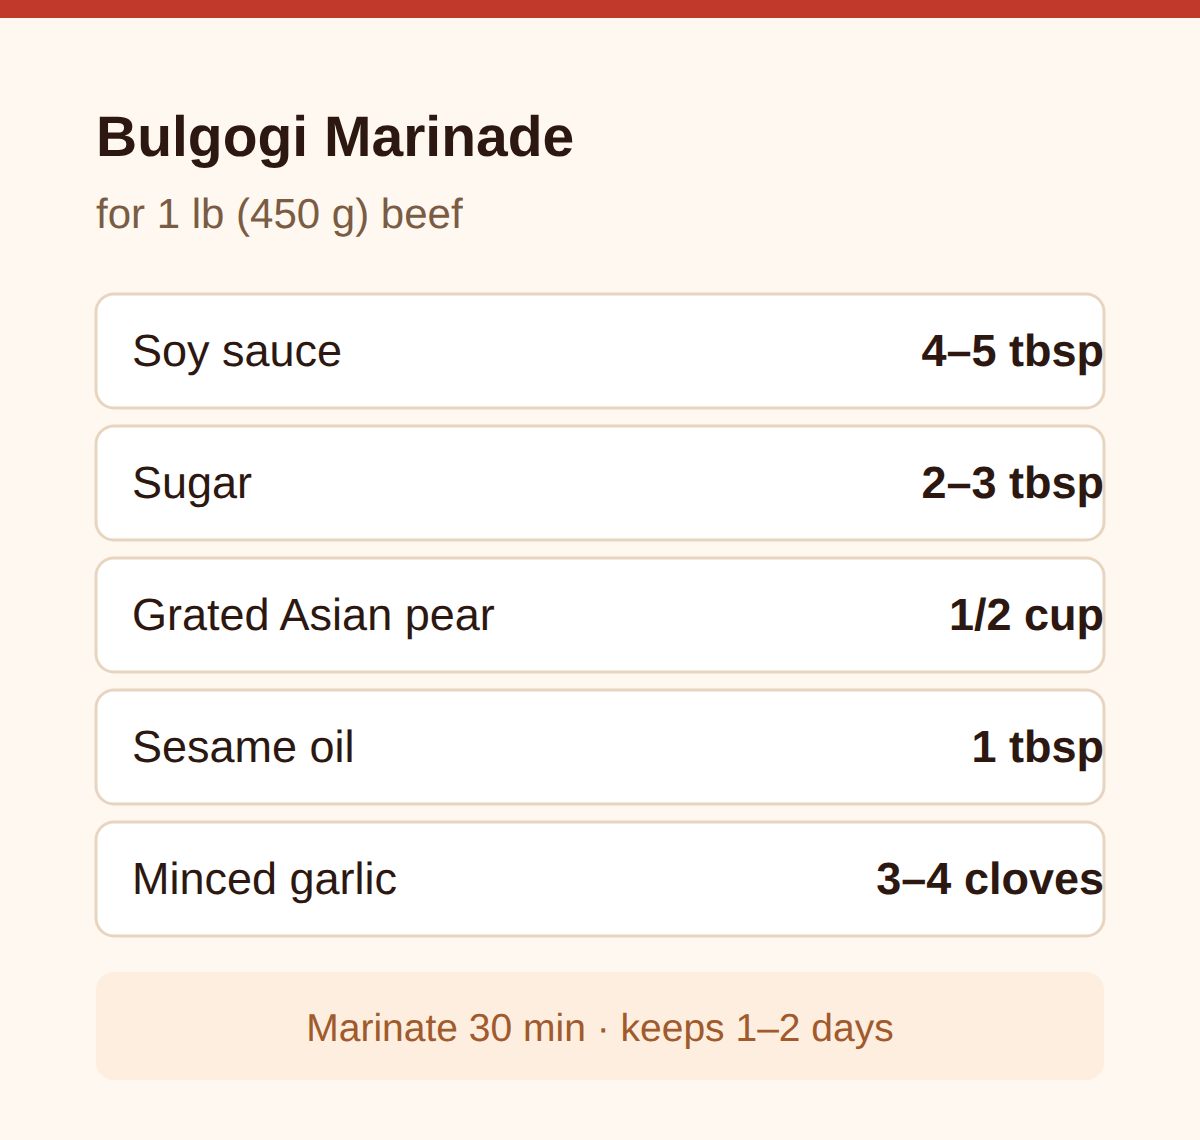
    For 1 lb (450 g) of thin-sliced beef, the working ratio is 4–5 tablespoons soy sauce, 2–3 tablespoons sugar, 1/2 cup grated Asian pear, 1 tablespoon sesame oil, and 3–4 minced garlic cloves.
    That works out to roughly 1 tablespoon of soy sauce per 100 g of beef, which is an easy way to scale the recipe up or down.
    Korean rice syrup (mullyeot) or honey can replace the white sugar for a rounder, glossier sweetness.

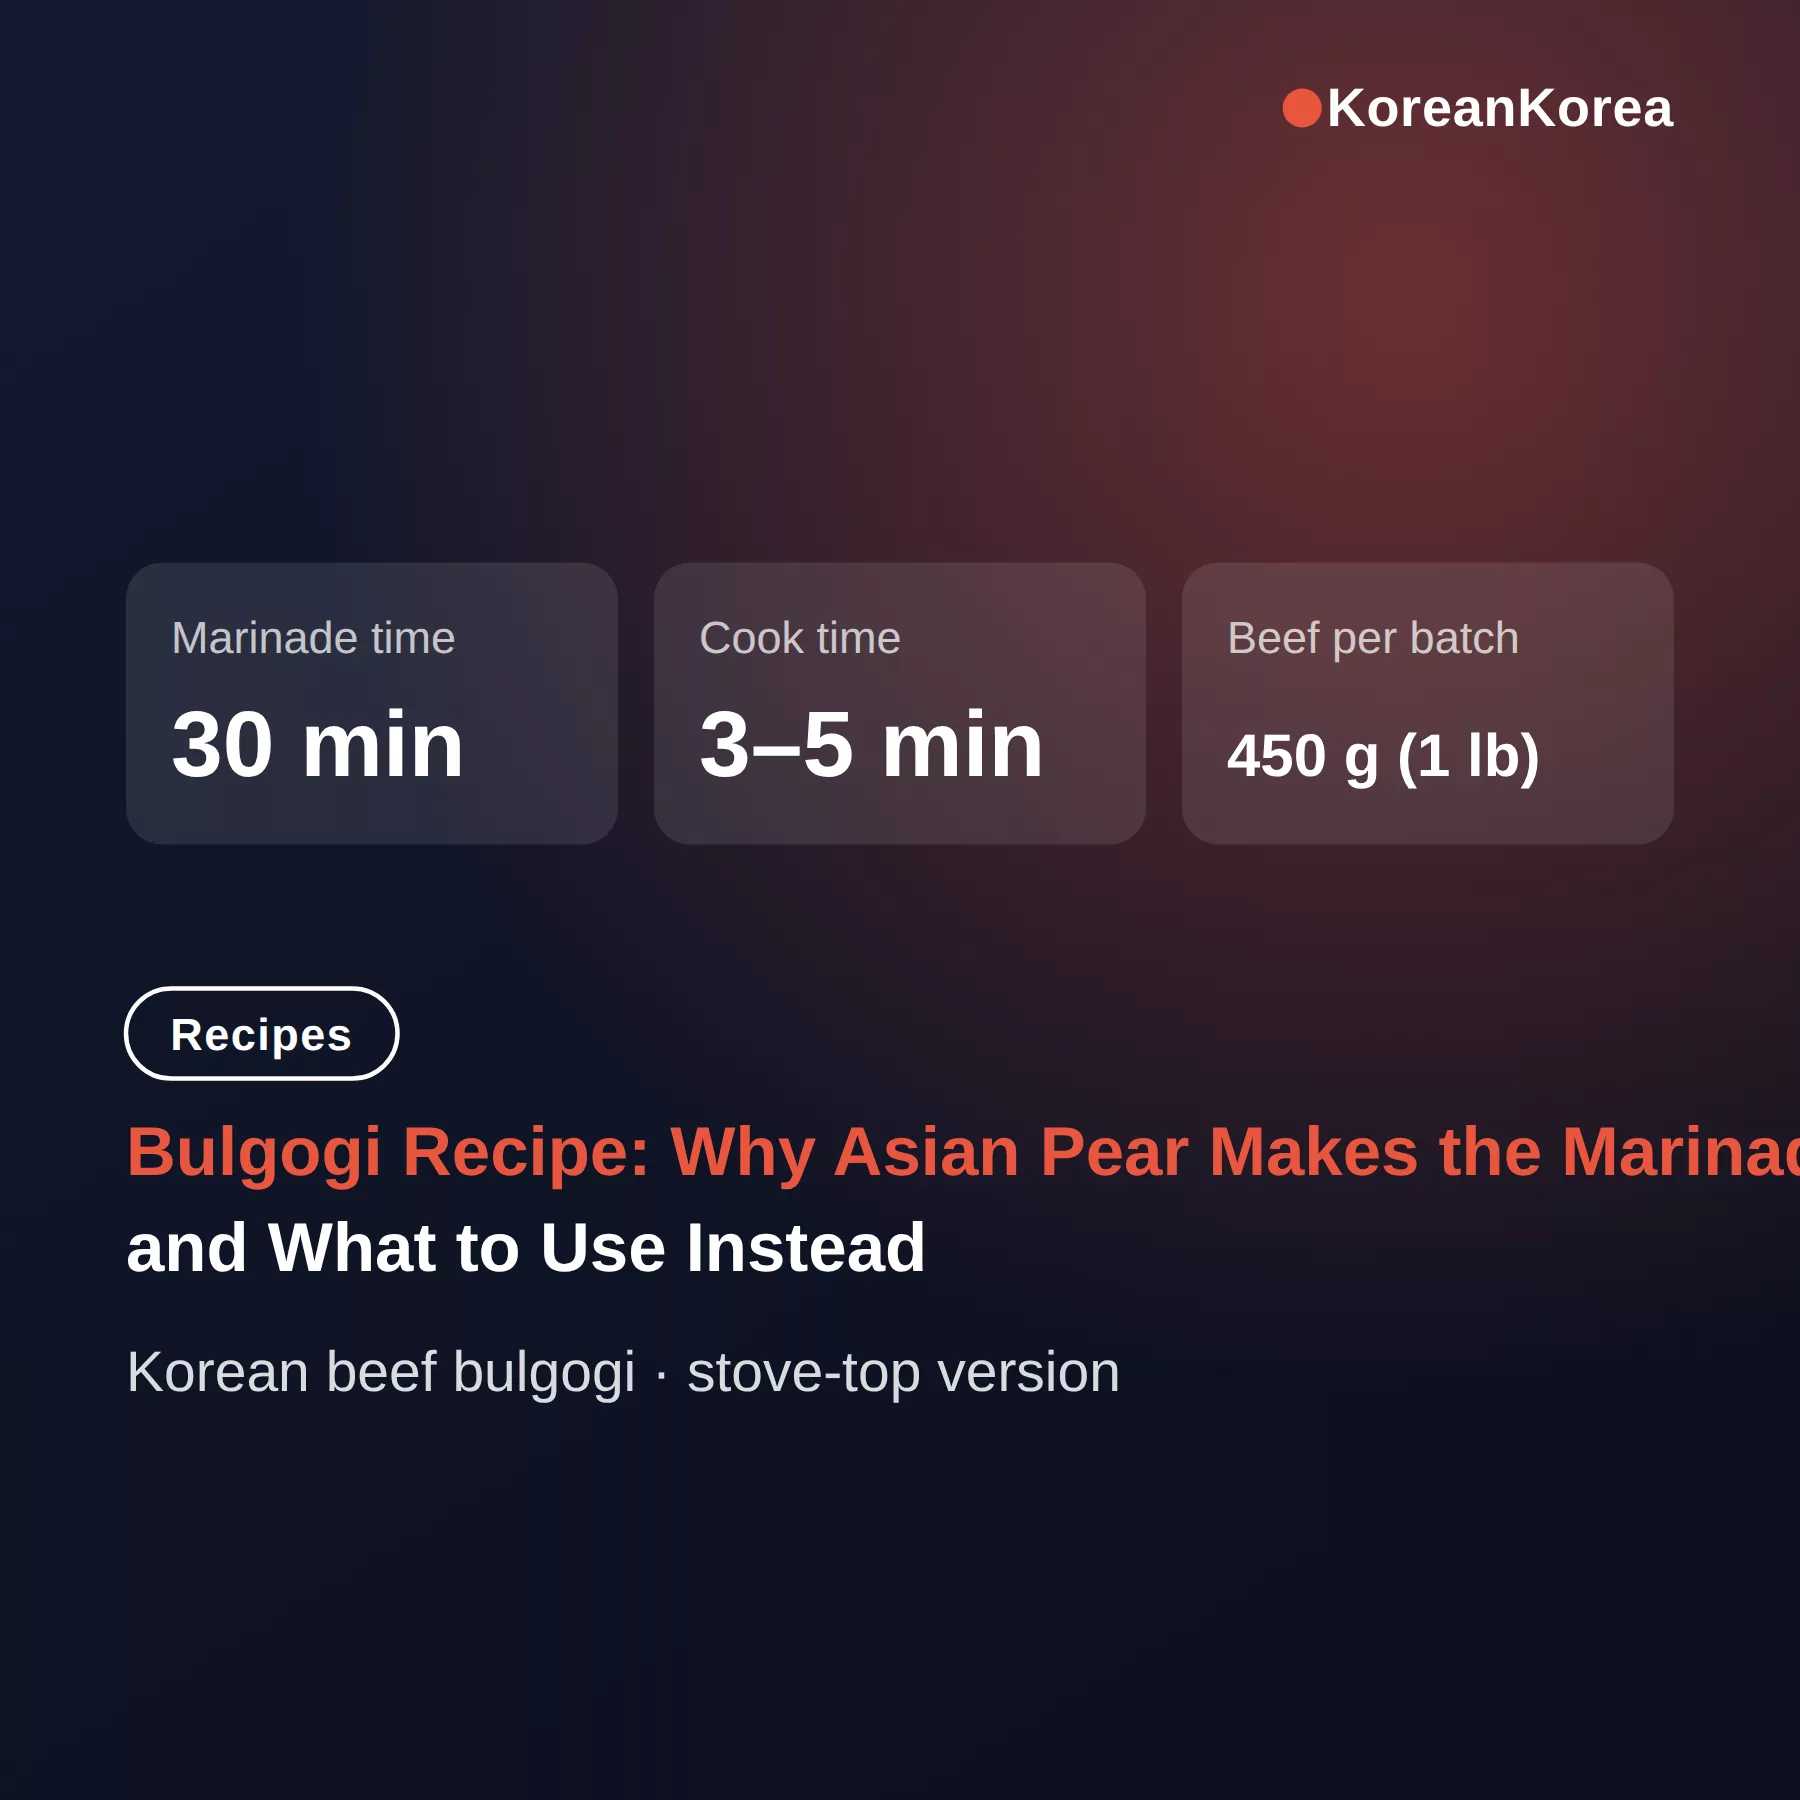
    Thin-sliced bulgogi needs only about 30 minutes in this marinade before cooking.
    Longer soaking deepens the flavor, and the pear enzyme is mild enough that overnight in the refrigerator does not hurt the texture.
    Raw marinated beef keeps 1–2 days refrigerated before cooking.

    [ figures/01-marinade-ratio.svg | alt: Bulgogi marinade ratio card for 1 lb of beef | caption: Core ratio for 450 g (1 lb) of thin-sliced beef ]

    For seasoning the meat itself rather than the marinade, baking soda is a separate option: sprinkle about 1/4 teaspoon over the sliced beef for 15–20 minutes, rinse, then marinate.
    That is a quick tenderizer for days when no fruit is available.

    The core marinade ratio for 1 lb of beef
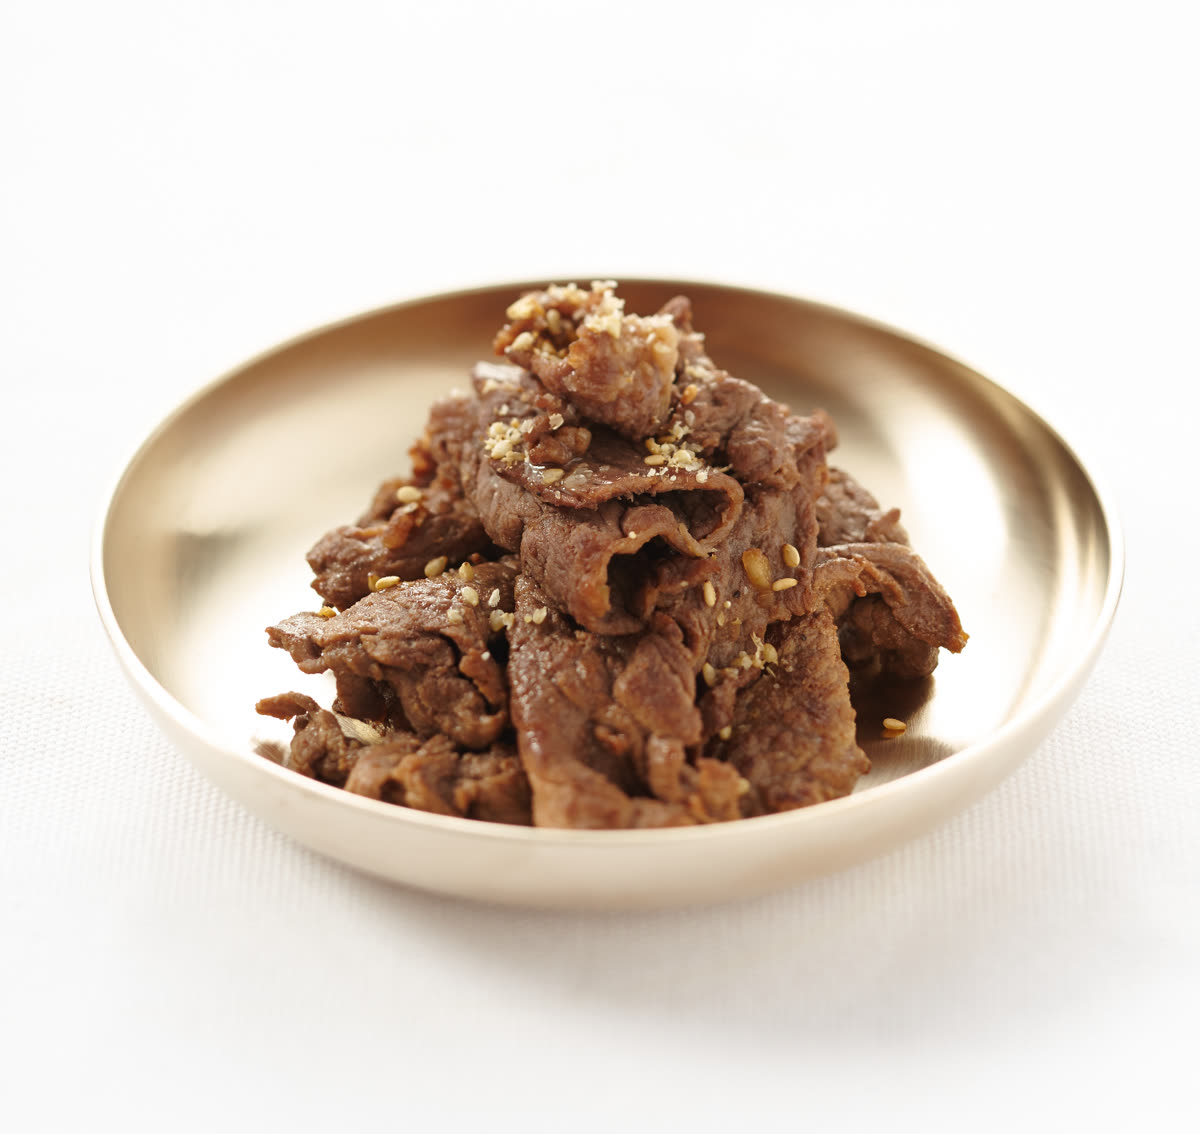
    Bulgogi 2 — The core marinade ratio for 1 lb of beef
    Photo: Bulgogi 2 by 국립국어원 — CC BY-SA 2.0 (Openverse)

    👉 Galbijjim Recipe for Chuseok: Braised Short Ribs That Slump Off the Bone — A Galbijjim Recipe for First-Timers

    Pear substitutes: apple, kiwi, pineapple, onion

    No Asian pear?
    Grated sweet apple (Fuji is the usual pick) is the most available substitute.
    It has less tenderizing power than pear, so add a little grated onion to compensate.
    The texture and flavor land closest to the original.

    Kiwi works too, but it tenderizes faster than pear and can turn the meat mushy after about 30 minutes.
    Pineapple is the most aggressive of the three — use about half the pear quantity, roughly 1/4 cup per pound, and keep marinating under 1 hour.

    [ figures/02-pear-substitutes.svg | alt: Comparison of four Asian pear substitutes for bulgogi | caption: Four swaps ranked by how close they land to pear ]

    When no fruit is on hand at all, grated onion plus extra sugar replicates the sweetness but not the tenderizing.
    In that case, slice the meat thinner instead — thickness matters more than the enzyme when there is none.

    Any crisp round pear can also stand in for the Korean nashi pear, grated with the peel on.
    Soft pears mostly add water without much tenderizing effect.

    No ribeye abroad: cuts and thin slicing

    Ribeye or sirloin sliced 2–3 mm is the standard cut, and Korean markets sell it pre-sliced labeled for bulgogi.
    At a regular Western supermarket, ask the butcher to slice ribeye or sirloin paper-thin on the deli slicer — many will do it on request.

    Slicing at home works too, with one trick: freeze the beef block for 1–2 hours until firm, then hand-slice 2–3 mm with a sharp knife.
    Slice against the grain so the short muscle fibers stay tender after quick high-heat cooking.

    Any fast-cooking steak works if it is cut thin across the grain — flank, skirt, and sirloin all grill in the same 3–5 minutes as the original cut.
    What matters is the thickness, not the name of the cut.

    [ figures/03-slicing-flow.svg | alt: Flow of freezing, slicing against the grain, and marinating bulgogi beef | caption: From a supermarket steak to bulgogi-ready slices ]

    Stove-top grilling: sear without charcoal

    Thin-sliced bulgogi cooks in roughly 3–5 minutes on a hot pan or grill, so no charcoal setup is needed.
    A cast-iron skillet or grill pan on high heat does the job.
    Preheat until a drop of water skitters across the surface — the beef should sizzle on contact.

    Cook in a single layer and in batches.
    Crowding the pan releases water and boils the meat instead of searing it, which is the single most common mistake on a home stove.
    The slices are done as soon as they are fully browned with no pink, and thin slices overcook in under a minute past that point, so pull them as soon as the color turns.

    Reserve a portion of fresh marinade before the beef goes in if a pan sauce over rice sounds good.
    Raw marinade that touched the beef should not be reused unless boiled for 2–3 minutes first.

    👉 Samgyetang Recipe: Fight Summer Heat With a Boiling Soup, Not Ice

    Serving, mistakes, and the mushroom version

    The traditional way to eat bulgogi is as a wrap: a lettuce leaf, a piece of meat, ssamjang, and rice, with kimchi and other banchan on the side.
    The pan drippings double as a sauce over rice, which is why the same meal works as a rice bowl at home.

    For a meatless version, thick slabs of king oyster mushroom and tofu take the same pear-soy marinade.
    Keep their marinating time at 20 minutes or less — the texture collapses beyond that.

    Three mistakes cover most failed batches.
    Overloading the pan so the meat steams instead of sears.
    Using soup soy sauce instead of brewed soy sauce, which makes the marinade much saltier and throws off the ratio.
    And leaving kiwi or pineapple in the marinade for hours, which turns the texture to mush.
    Bulgogi is also a flexible protein beyond the grill — bulgogi tacos and rice bowls are common uses abroad, and the marinade alone is worth making.

    Related posts

    📎 bibimbap recipe: season every vegetable separately, then mix — 4 servings
    📎 📅 다가오는 일정 — 발매·개봉·발표 캘린더

    Sources

    Bulgogi recipe essentials

    • Check the meat at 30 minutes — with kiwi or pineapple it may already be at the mushy limit
    • Rinse the baking soda off the beef before the marinade goes on
    • Bottled marinade runs sweeter and thinner than homemade — taste before adding sugar
    • Leftovers wrap well in lettuce with ssamjang and kimchi the next day

    FAQ

    Q. What can I substitute for Asian pear in bulgogi marinade?

    Grated sweet apple is the closest swap, kiwi works but mushies the meat after about 30 minutes, pineapple needs half the quantity and under 1 hour, and grated onion with extra sugar covers sweetness without tenderizing.

    Q. How long do I marinate thin-sliced bulgogi?

    About 30 minutes is enough for thin slices. Overnight in the refrigerator deepens the flavor without hurting the texture, and raw marinated beef keeps 1–2 days before cooking.

    Q. What cut of beef works if ribeye is unavailable?

    Flank, skirt, or sirloin all work when sliced 2–3 mm against the grain. Freeze the block 1–2 hours first, or ask the butcher to slice it paper-thin on the deli slicer.

    Q. Can I grill bulgogi on a stove-top pan instead of charcoal?

    A cast-iron skillet or grill pan on high heat cooks thin-sliced bulgogi in 3–5 minutes. Keep the meat in a single layer and cook in batches so it sears instead of steams.

    Try the marinade with half a grated pear on 1 lb of beef first, then test a substitute in the same batch and see which sear you like better.

    #bulgogirecipe #bulgogimarinade #koreanbbqbeef #asianpearmarinade #bulgogipearsubstitute #howtomakebulgogi

  • bibimbap recipe: season every vegetable separately, then mix — 4 servings

    bibimbap recipe: season every vegetable separately, then mix — 4 servings

    Bibimbap means mixed rice — bibim is mixed, bap is cooked rice — and everything goes into one bowl before the first bite.

    Contents

    1. Bibimbap means mixed rice — and that is the whole point
    2. bibimbap recipe ingredients for 4 servings
    3. Prepare each vegetable separately — or use the 6-item shortcut
    4. Assembly, and the dolsot bowl that crackles
    5. Variants and honest substitutions
    6. Wrapping up

    Bibimbap means mixed rice — and that is the whole point

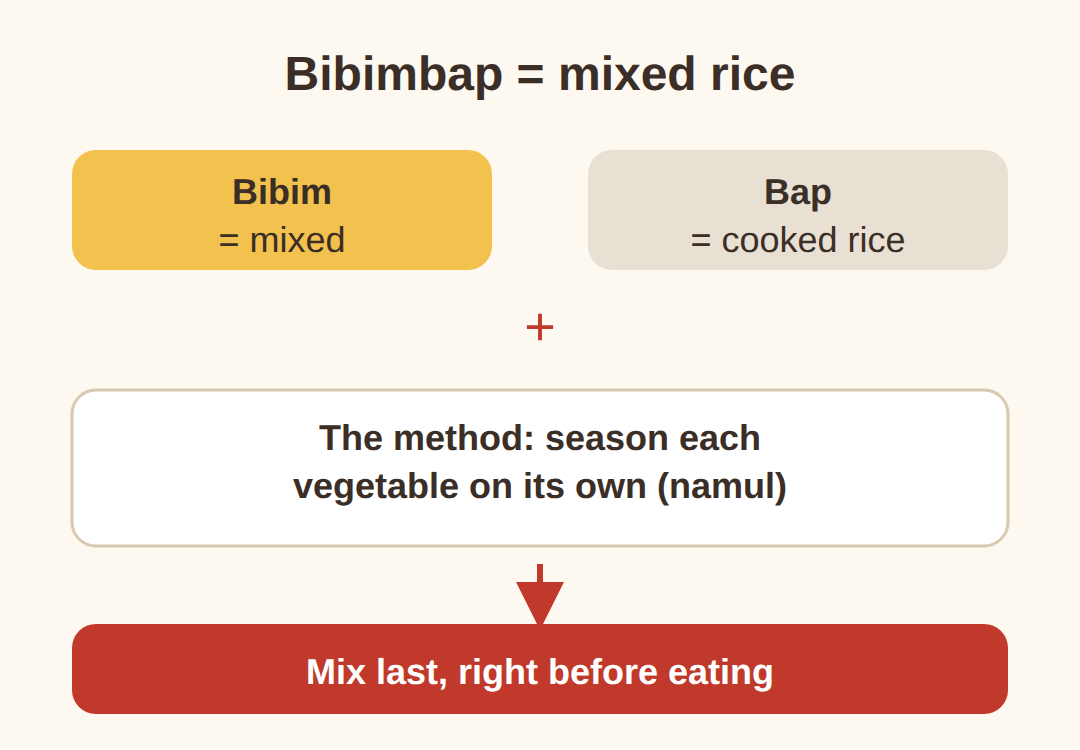
    Bibim means mixed and bap means cooked rice, so the name tells you exactly what happens at the table: everything is stirred together before eating.
    That mixing is the last step, not the method.
    The method is the opposite of throwing everything into one pan.
    Each vegetable is cooked and seasoned on its own, as namul, so every topping keeps its own texture and flavor.
    The point of that extra work is balance — colors, textures and seasonings offset each other in the bowl instead of turning into one soft gray mass.
    In Korea today the most common home version is even simpler: leftover side dishes, a spoonful of gochujang and a drizzle of sesame oil over rice.
    There is no single official bibimbap recipe, and toppings are swapped freely with whatever is in the fridge — that flexibility is the fun of it.
    One thing does stay fixed: the rice should be hot when the bowl is built, while the vegetables can be room temperature or warm.

    4 Short-grain rice, soybean sprouts, spinach, carrot, beef, egg, gochujang, sesame oil
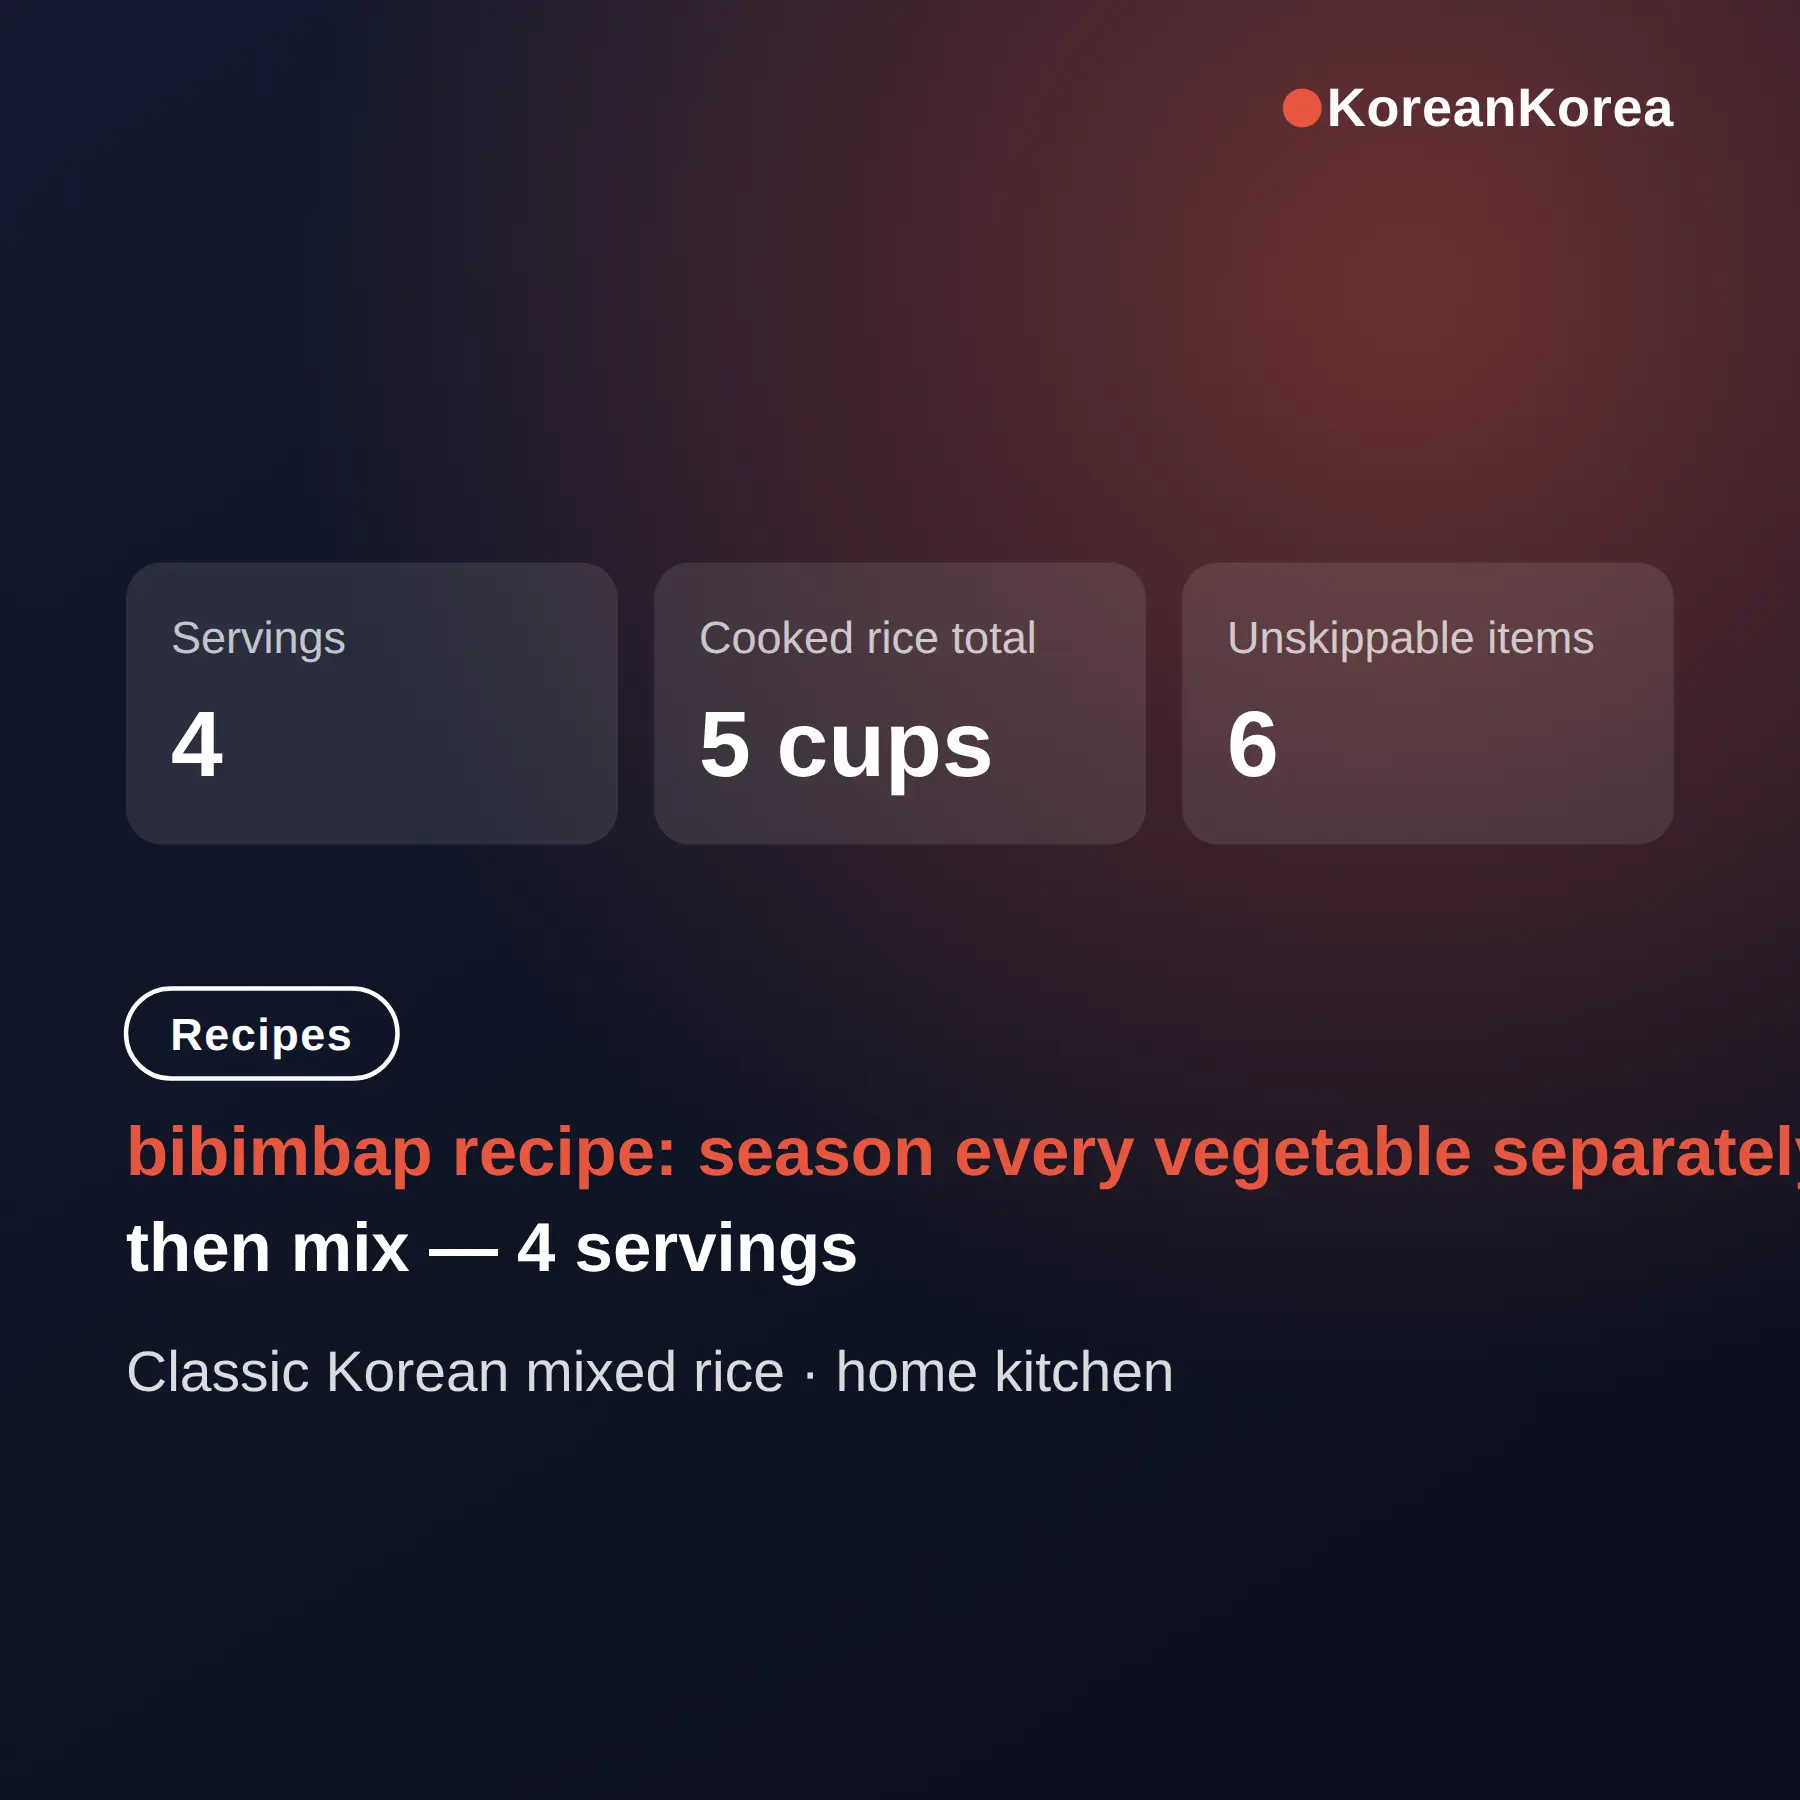
    Cooked rice per serving A little more than 1 cup (1.25 cups; 5 cups total)
    Soybean sprouts per serving 3 oz (12 oz for 4)
    Gochujang per bowl 1 tablespoon, plus more at the table
    Quick version About 10 min prep and 40 min cooking for 1 serving
    Dolsot crispy rice A few drops of sesame oil in a hot stone bowl, until the rice crackles
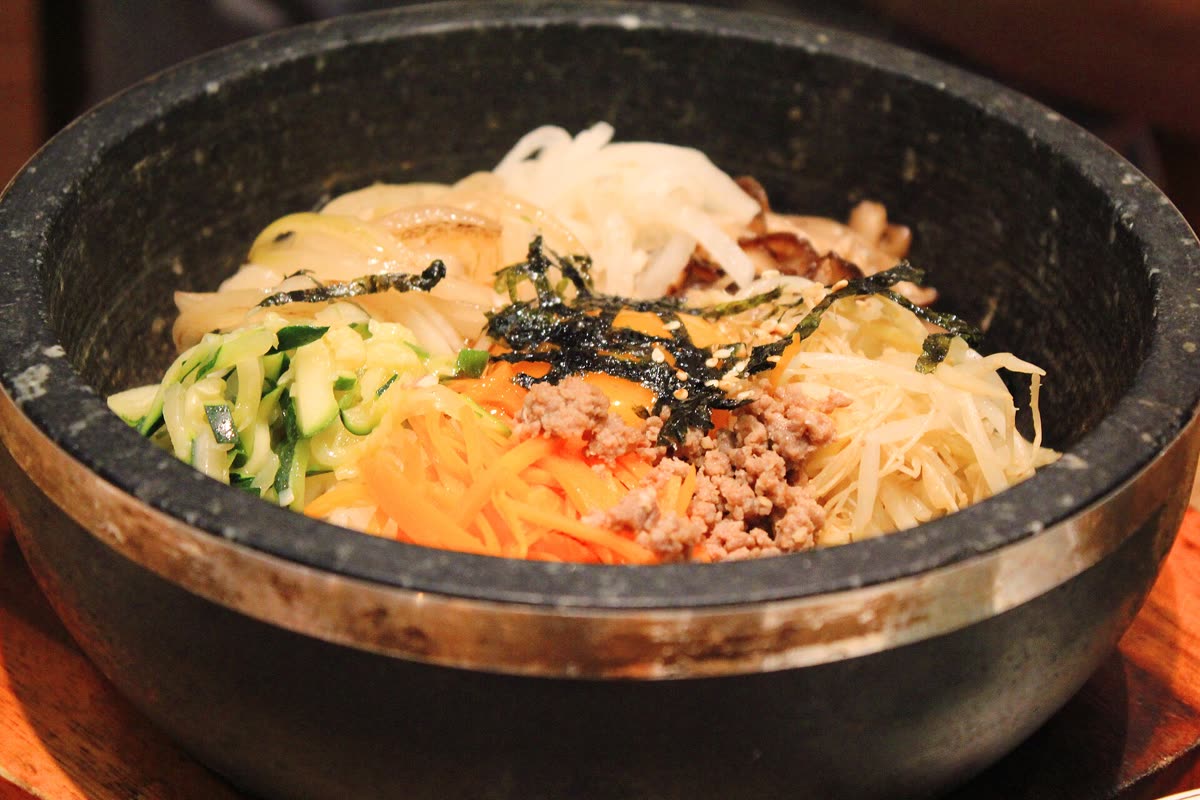
    Bibimbap means mixed rice — and that is the whole point
    Dolsot Bibimbap (6352434359) — Bibimbap means mixed rice — and that is the whole point
    Photo: Dolsot Bibimbap (6352434359) by Chloe Lim from Seoul, South Korea — CC BY 2.0 (Wikimedia Commons)

    bibimbap recipe ingredients for 4 servings

    The classic list below serves 4, each bowl getting a little more than 1 cup of cooked short-grain rice — 5 cups in total.
    Meat is half a pound of lean beef, classically seasoned raw beef (yukhoe), with one egg per bowl.
    If raw egg or raw beef is not your thing, fry the egg sunny side up and lightly pan-fry the beef instead.
    The full vegetable set runs long, and the two dried items at the end are the ones that take planning.

    Prepare each vegetable separately — or use the 6-item shortcut

    Season each topping separately because it lets you control doneness and salt level for every ingredient; that is what keeps a cucumber crisp while spinach turns silky.
    Cut everything thin or julienned so the finished bowl is easy to mix.
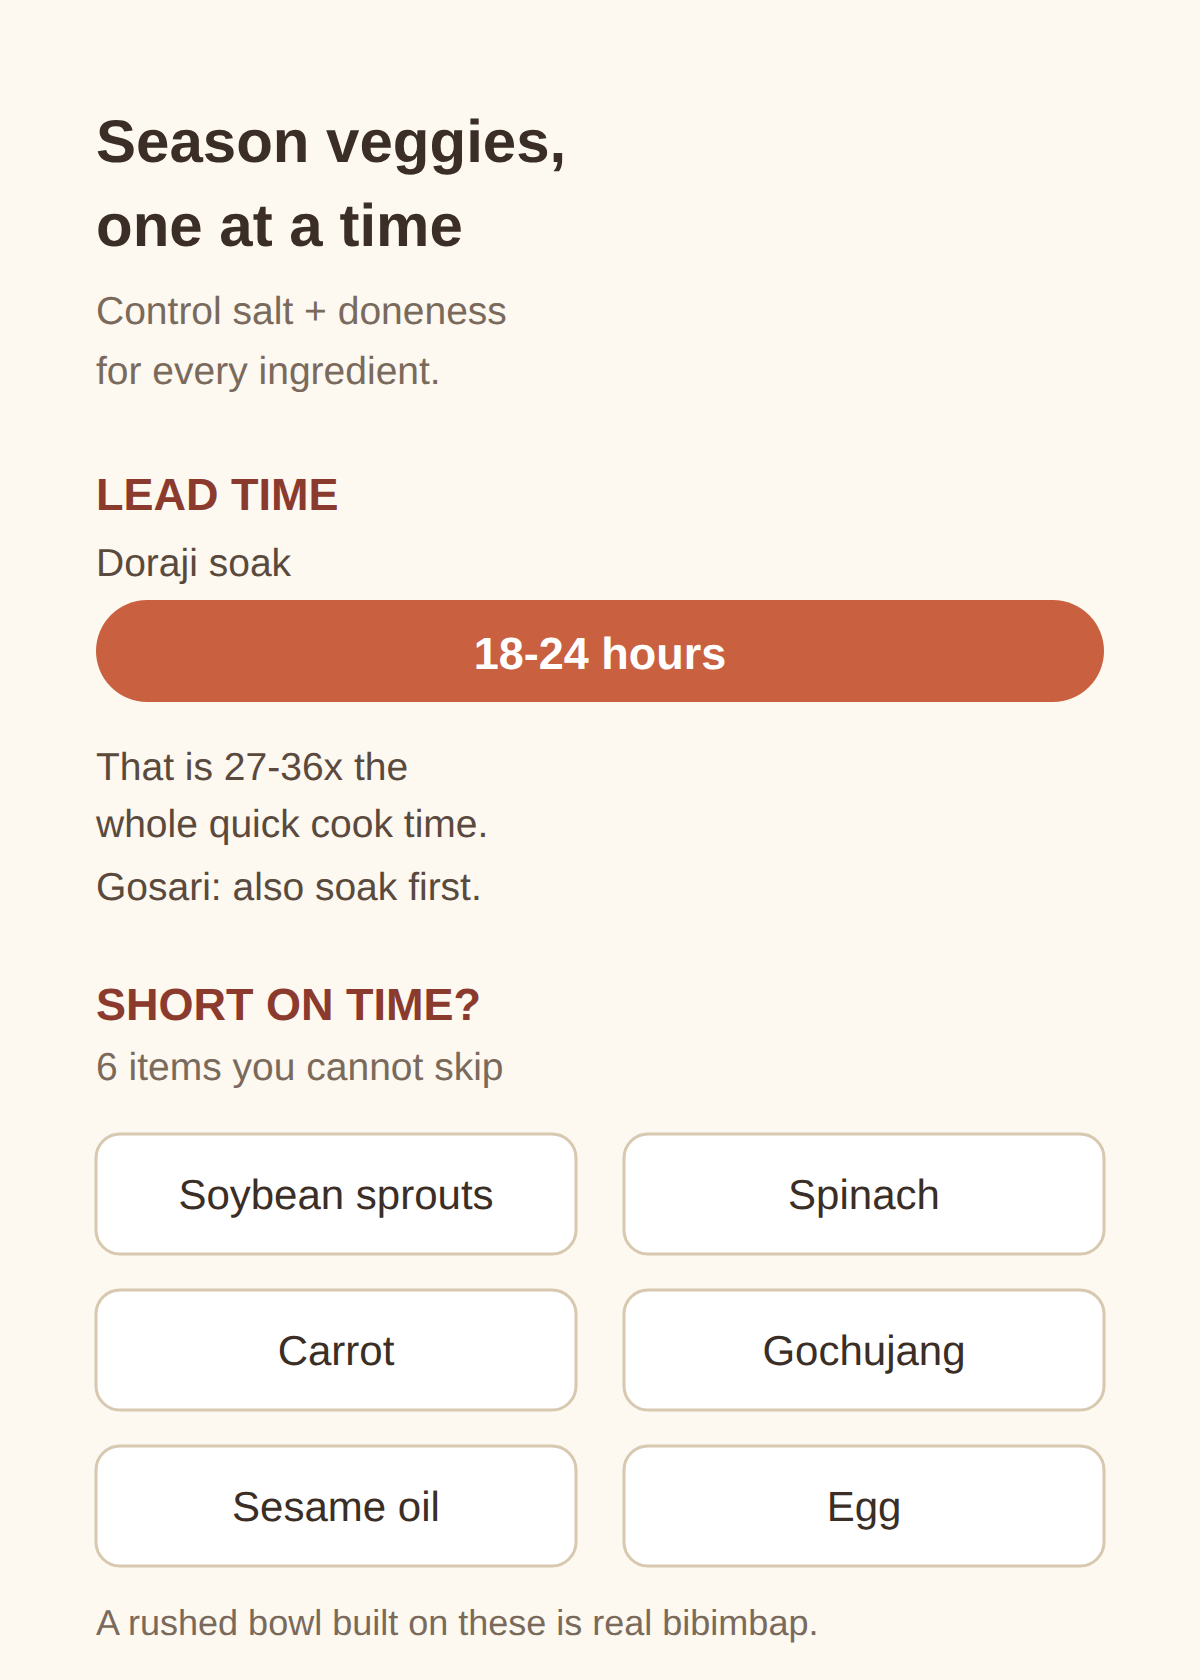
    Two dried vegetables come with a lead time: dried bellflower root (doraji) soaks in cold water for 18 to 24 hours, which is 27 to 36 times the entire cooking time of the quick version below.
    Dried fernbrake (gosari) needs a soak before use as well.
    For the seasonings, keep salt, vegetable oil, toasted sesame oil, sesame seeds, garlic, soy sauce, honey and gochujang on hand.
    Short on time?
    Soybean sprouts, spinach, carrot (or red bell pepper), gochujang, toasted sesame oil and an egg are the six unskippable items — a rushed bowl built on those is a legitimate bibimbap, not a lesser one.

    Prepare each vegetable separately — or use the 6-item shortcut

    Assembly, and the dolsot bowl that crackles

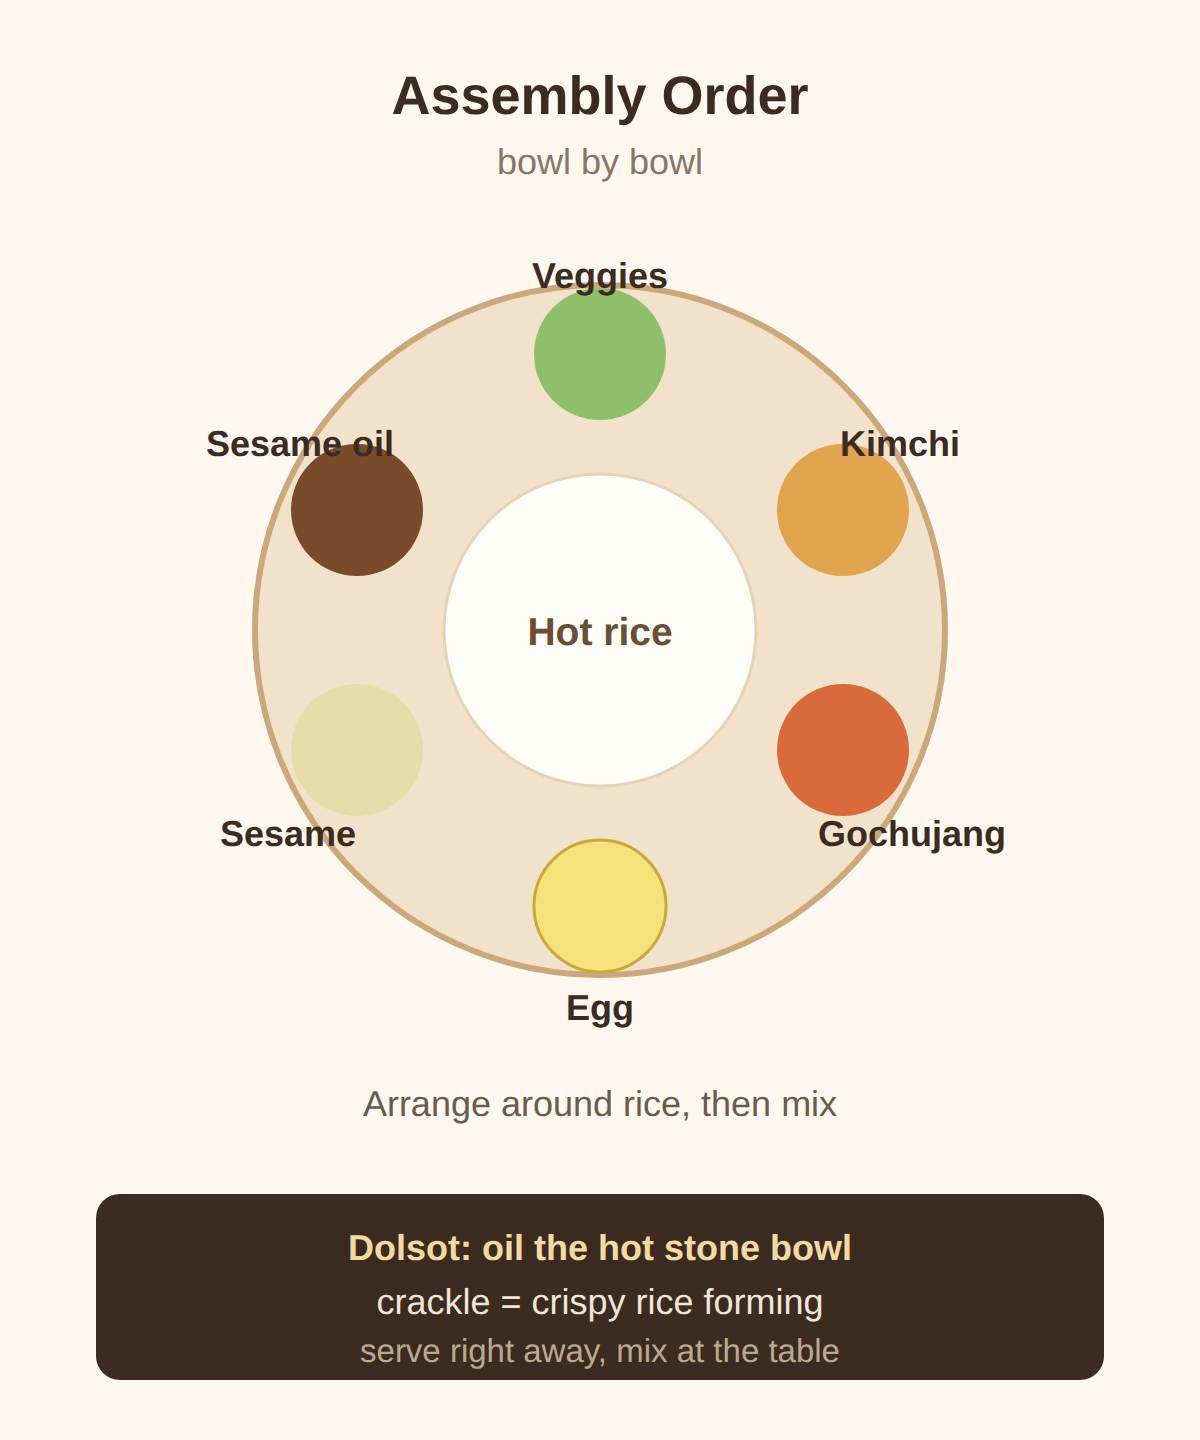
    Mound the hot rice first, then arrange the toppings around it in a circle, wet radish kimchi in its own juice if you are using it.
    Finish each bowl with the egg, 1 tablespoon of gochujang, a sprinkle of sesame seeds and a drizzle of sesame oil, and mix everything together right before eating.
    Put a small bowl of extra gochujang on the table — how much goes in is a personal call.
    For dolsot-bibimbap, add a few drops of toasted sesame oil to a heated stone or earthenware bowl before the rice goes in.
    Set it over medium-high heat and listen: a ticking, crackling sound means the crispy rice layer is forming at the bottom.
    Bibimbap is served immediately, often with kimchi and a small bowl of soybean sprout soup topped with chopped green onion.

    Assembly, and the dolsot bowl that crackles

    Variants and honest substitutions

    The most lavish version is Jeonju bibimbap, with about 30 toppings including bracken, bellflower root and yukhoe — roughly seven and a half times the toppings of the basic bowl, and rarely made today because of the labor.
    Jinju is the other famous regional name, and Seoul restaurants mostly serve raw and sautéed vegetables in place of the old ritual-derived garnishes.
    If gochujang is not on hand, yak gochujang (gochujang mixed with sautéed ground beef), plain soy sauce or a thick soybean paste all work.
    The quick vegetable version — sprouts, spinach, carrot and gochujang-seasoned ground beef — runs about 10 minutes of prep and 40 minutes of cooking for 1 serving.
    Every component can be made ahead, and radish kimchi keeps 2 to 3 days in advance, which is exactly why the leftover-banchan version is the everyday bowl in Korean homes.

    Wrapping up

    Start with the six unskippable items on your first try, then add one vegetable at a time as your prep routine settles.
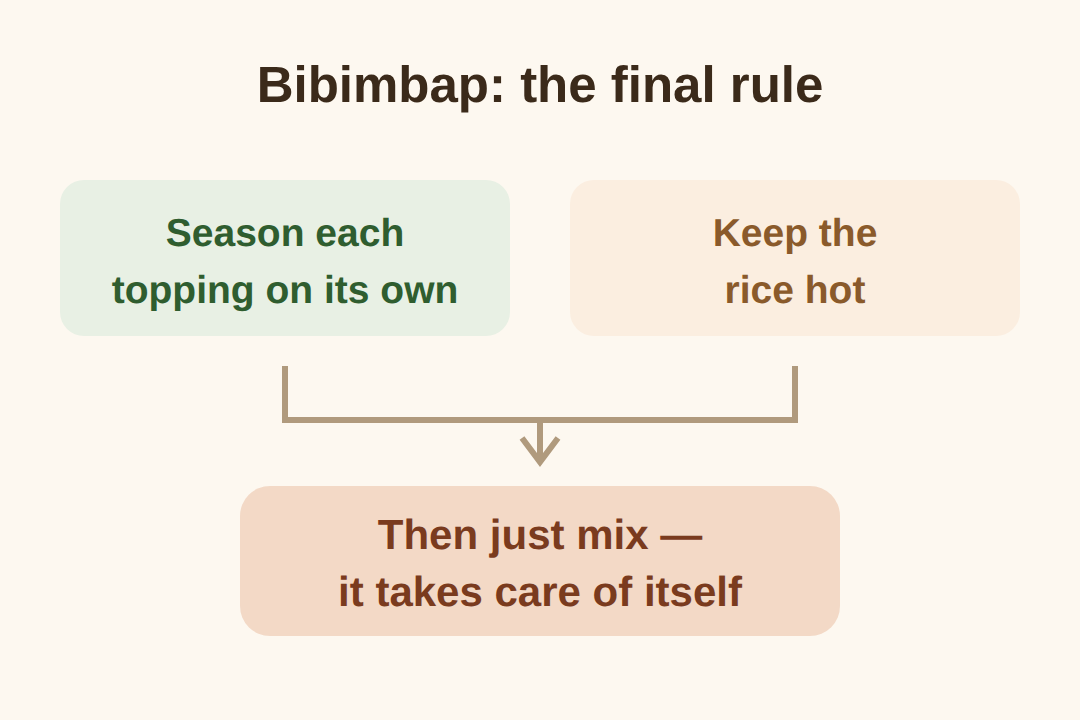
    Season each topping on its own, keep the rice hot, and the mixing takes care of itself.

    Wrapping up

    Related posts

    📎 Samgyetang Recipe: Fight Summer Heat With a Boiling Soup, Not Ice
    📎 Galbijjim Recipe for Chuseok: Braised Short Ribs That Slump Off the Bone — A Galbijjim Recipe for First-Timers

    Sources

    Tips before you start

    • Cook and season each vegetable in its own pan; a shared pan blends the flavors you are trying to keep apart.
    • Mound the hot rice first, then arrange the toppings in a circular pattern so every spoonful gets a bit of each.
    • Put a few drops of toasted sesame oil in the stone bowl before adding rice — wait for the ticking, crackling sound.
    • Pass extra gochujang at the table, and serve with kimchi and a small bowl of soybean sprout soup on the side.
    • All components can be made 2-3 days ahead, so the final assembly takes minutes.

    FAQ

    Q. Can I skip gosari and doraji?

    Yes. There is no fixed topping list — omit or substitute them with other side dishes or kimchi, and keep the six unskippable items: soybean sprouts, spinach, carrot, gochujang, sesame oil and an egg.

    Q. How do I get crispy rice without a stone bowl?

    The crackling layer comes from sesame oil in a very hot bowl, as in dolsot-bibimbap. A verified stovetop substitute for the stone bowl did not come up in the sources this recipe is based on, so the exact result may differ with other cookware.

    Q. Raw egg yolk or fried egg?

    Both work. The classic topping is a raw yolk; if you prefer your eggs and beef cooked, use a sunny-side-up egg and lightly pan-fry the beef.

    Season every vegetable separately, then mix — the last step is the only easy one.

    #bibimbaprecipe #bibimbap #Koreanmixedrice #gochujang #dolsotbibimbap #namul #Koreanhomecooking

  • Galbijjim Recipe for Chuseok: Braised Short Ribs That Slump Off the Bone — A Galbijjim Recipe for First-Timers

    Galbijjim Recipe for Chuseok: Braised Short Ribs That Slump Off the Bone — A Galbijjim Recipe for First-Timers

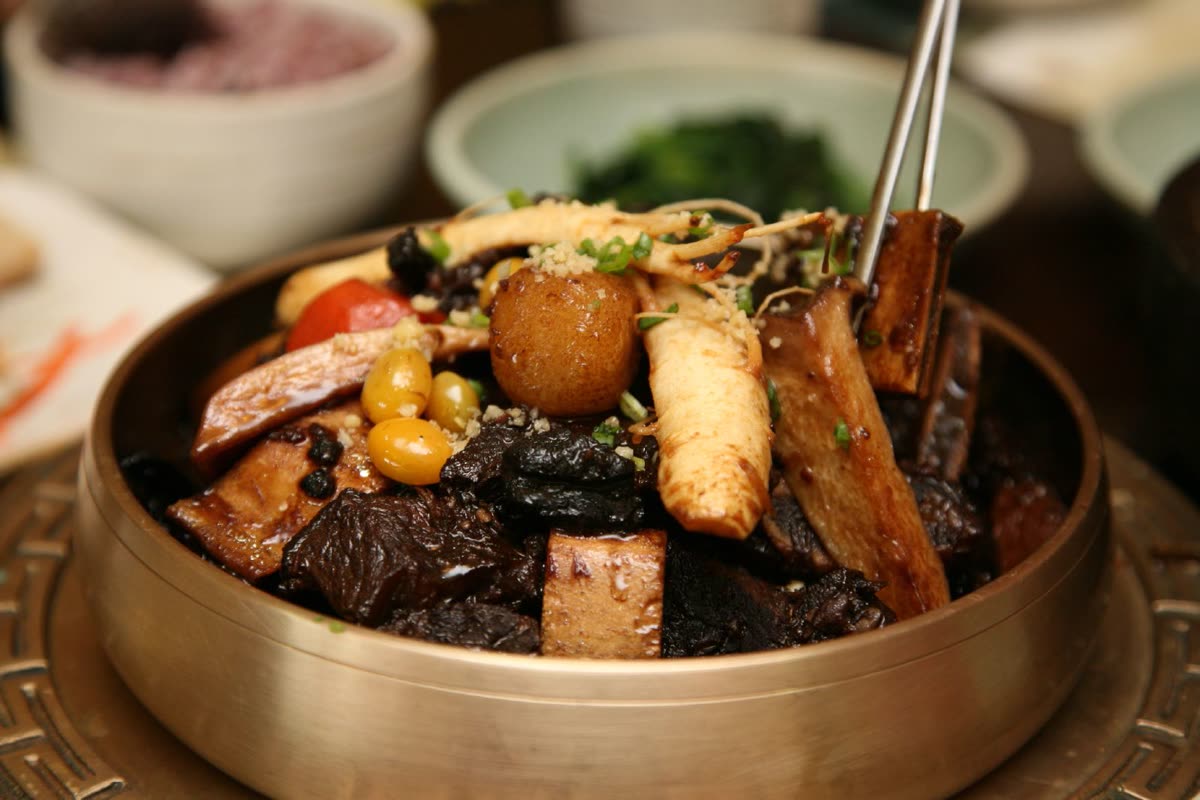
    Galbijjim is Korean braised short ribs cooked in a soy sauce broth with pear, ginger, and rice wine.

    Contents

    1. Galbijjim recipe: what it is and why it anchors the Chuseok table
    2. Short ribs and Asian pear — substitutions that work overseas
    3. Two cooking paths: stovetop or Instant Pot
    4. Make-ahead: fridge, freezer, and noodles kept separate
    5. Common first-timer mistakes
    6. Dates to check next

    Galbijjim recipe: what it is and why it anchors the Chuseok table

    Galbijjim is Korean braised short ribs, simmered in a soy sauce–based broth with pear, ginger, and rice wine.
    On Korean tables it is a holiday dish.
    It appears at Chuseok and Lunar New Year, and at birthday celebrations, served with rice and side dishes.
    Historically beef was rare and costly in Korea, so a long-braised short rib dish became one of the most festive things you can put on a table.
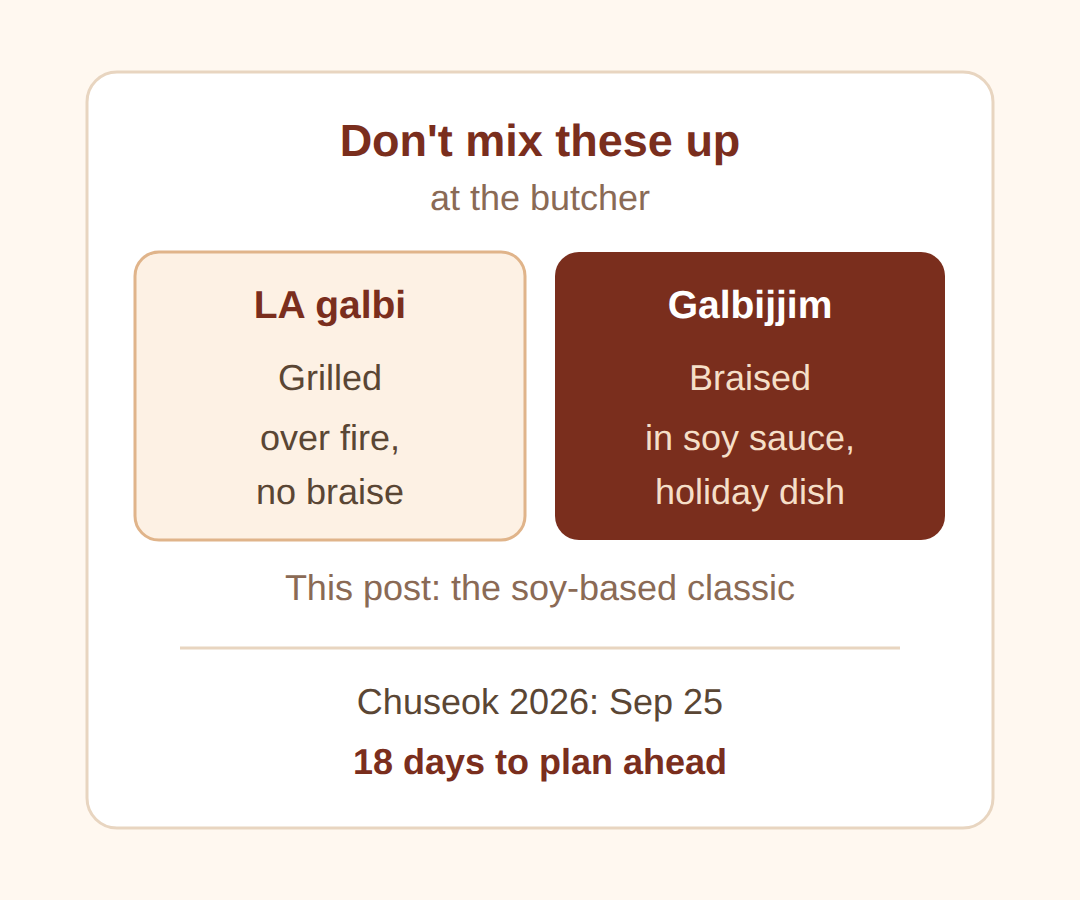
    Chuseok 2026 falls on September 25, which is 18 days from this writing.
    Recipe searches for holiday dishes spike in the 2–3 weeks before the holiday, so this is the window when most home cooks start planning.
    One naming note saves confusion at the butcher.
    LA galbi is grilled; galbijjim is braised in sauce, and they are different dishes.
    There is also a spicy gochujang-based version called maeun galbijjim.
    This post covers the soy-based classic, which is the one that belongs on the holiday table.

    1 Soak the ribs in cold water for 30 minutes to 1 hour to draw out the blood.
    2 Blanch the ribs briefly in boiling water to remove impurities.
    3 Braise in soy sauce, sugar, garlic, ginger, sesame oil, and rice wine until the sauce coats the meat.
    4 Reduce the liquid at the end until it turns into a thick glaze.
    5 Serve with rice and side dishes, topped with sesame seeds and sliced scallions.
    Galbijjim recipe: what it is and why it anchors the Chuseok table
    Korean braised beef short ribs-Galbijjim-02 — Galbijjim recipe: what it is and why it anchors the Chuseok table
    Photo: Korean braised beef short ribs-Galbijjim-02 by by Junho Jung at Flickr from South Korea — CC BY-SA 3.0 (Wikimedia Commons)

    Short ribs and Asian pear — substitutions that work overseas

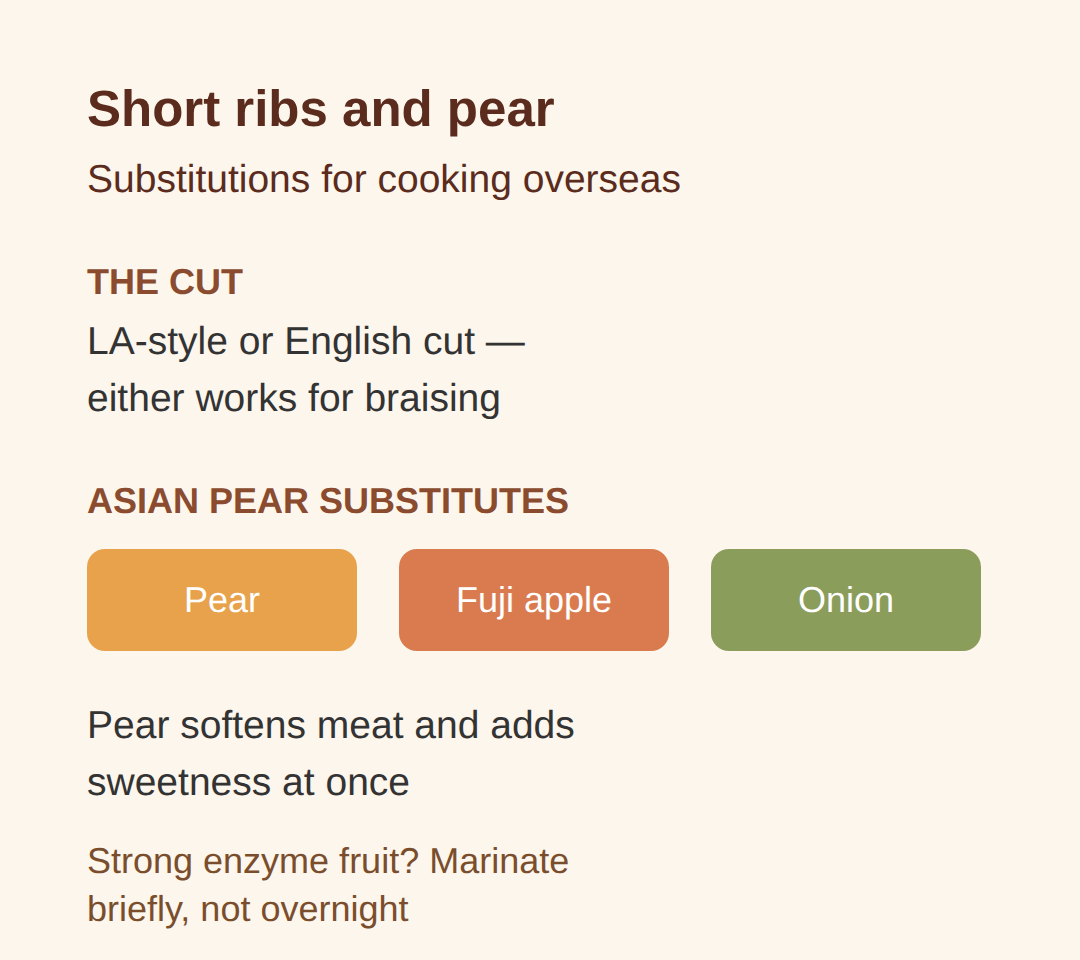
    The cut is beef short ribs, sold as LA-style cut or English cut.
    Either works for braising.
    Where the classic recipe calls for Asian pear, a regular pear, a Fuji apple, or onion can stand in.
    Asian pear does two jobs at once: its enzymes soften the meat and it adds sweetness.
    That is why the substitute matters more than most ingredient swaps in Korean cooking.
    If you go with a stronger enzyme fruit, marinate briefly rather than overnight.
    Kiwi in particular can turn the surface mushy if it sits too long.
    For sweetness and the glossy finish Korean recipes are known for, sugar with honey or rice syrup works.

    Short ribs and Asian pear — substitutions that work overseas
    Asian Pear Fruit May 2018 (258794257) — Short ribs and Asian pear — substitutions that work overseas
    Photo: Asian Pear Fruit May 2018 (258794257) by Randy Everette — CC BY-SA 3.0 (Wikimedia Commons)

    Two cooking paths: stovetop or Instant Pot

    A first-time cook has two confirmed routes, and the choice is mostly about time.
    On the stovetop you soak the ribs in cold water for 30 minutes to 1 hour, changing the water, then blanch them, then braise until the sauce reduces.
    The Instant Pot path takes about 45 minutes total, including pressurization.
    Against a stovetop braise of 60 to 90 minutes, that saves 15 to 45 minutes, or roughly a quarter to half the cooking time.
    Either way, doneness looks the same.
    The meat pulls back from the bone and a chopstick slides in with little resistance.
    Finish by reducing the braising liquid until it coats the ribs like a glaze.
    Carrots and radish are the usual vegetables.
    Chestnuts and jujubes are traditional additions, but optional rather than required.
    Glass noodles (dangmyeon) go in only near the end, for reasons the storage section explains.

    Make-ahead: fridge, freezer, and noodles kept separate

    Cooked galbijjim keeps about 4 days in the refrigerator.
    In the freezer it keeps up to 3 months, which is roughly 22 times longer than the fridge window.
    With Chuseok 18 days away, a batch frozen today uses only about 20% of its freezer life by the holiday.
    Freezing well ahead is safe.
    One rule decides whether the frozen batch comes back good.
    Leave the glass noodles out of the freezer portion.
    They absorb liquid and swell, so frozen noodles turn mushy.
    Freeze the ribs and sauce, then cook the noodles fresh on the day you serve.
    Scale the meat by the table.
    About 1 lb (450 g) of short ribs serves 2–3 as a main, so a six-person Chuseok table needs roughly 2–2.5 lb (900–1,150 g), and less if the spread has many other dishes.

    Common first-timer mistakes

    The most common miss is skipping the blood soak.
    Cold water for 30 minutes to 1 hour, with a change of water, draws out blood and impurities before cooking.
    The second mistake is putting glass noodles in too early or freezing them.
    Noodles belong at the end of cooking or on the reheating day, never in the freezer bag.
    The third is confusing the two dishes at the store.
    Flanken-cut ribs sold for LA galbi are a grill cut; braising suits the bone-in English-cut style better.

    Dates to check next

    Chuseok falls on September 25, 2026.
    If you plan to freeze a batch, cooking it in the next two weeks leaves the most freezer margin.
    The storage numbers in this post run on a 3-month freezer clock, so a batch made after late June 2027 is past the window stated here.

    👉 galbijjim recipe

    👉 Maangchi’s galbijjim recipe

    👉 Galbi-jjim background

    Related posts

    📎 Samgyetang Recipe: Fight Summer Heat With a Boiling Soup, Not Ice

    Sources

    Frequently asked questions

    • The recipe works without Asian pear — a bosc pear, a Fuji apple, or grated onion covers tenderizing and sweetness.
    • In an Instant Pot, about 45 minutes total gets the ribs fork-tender, against 60–90 minutes on the stovetop.
    • Freeze the ribs and sauce without glass noodles, and cook the noodles fresh on serving day.
    • Reheat gently on the stovetop with a splash of water, or microwave covered, so the meat does not dry out.
    • Cooked galbijjim keeps about 4 days refrigerated, and up to 3 months frozen.

    FAQ

    Q. Can I skip the Asian pear?

    Yes. A bosc pear, a Fuji apple, or onion covers both the tenderizing and the sweetness. Asian pear is classic, not mandatory.

    Q. How long does galbijjim keep?

    About 4 days refrigerated, and up to 3 months frozen — without the glass noodles, which are added fresh on reheating.

    Q. How do I know the ribs are done?

    The meat pulls back from the bone and a chopstick slides in with little resistance. The sauce should be reduced to a thick glaze.

    Chuseok 2026 lands on September 25. If a frozen batch is the plan, the freezer math above says an early start costs nothing.

    피프 — 드디어 클로드로 영상까지 만듭니다

    Cover photo: Korean braised beef short ribs-Galbijjim by by Junho Jung at Flickr from South Korea — CC BY-SA 3.0

    #galbijjimrecipe #braisedshortribs #Koreanshortribs #Chuseokfood #InstantPotKoreanrecipe #Koreanpearsubstitute #galbijjimstorage #holidayKoreandish

  • Samgyetang Recipe Without a Spring Chicken: Supermarket Substitutions That Work

    Samgyetang Recipe Without a Spring Chicken: Supermarket Substitutions That Work

    Samgyetang is a Korean soup built around a small young chicken stuffed with sweet rice, ginseng, garlic and jujubes, then simmered for about an hour.
    The traditional bird is a spring chicken of roughly 1 lb, and most supermarkets abroad do not stock one.
    This guide covers what to buy instead, how to handle ginseng when it is unavailable, and the stuffing and simmering steps that decide the final texture.

    Contents

    1. Samgyetang recipe: why hot soup in hot weather (iyeolchiyeol)
    2. Which chicken to buy when there is no spring chicken
    3. Ginseng: fresh, dried, or a market kit
    4. Stuffing the bird: sweet rice and the expansion warning
    5. How much water for one Cornish hen — 5 to 6 cups and a 50-minute simmer
    6. Seasoning happens at the table, not in the pot

    Samgyetang recipe: why hot soup in hot weather (iyeolchiyeol)

    Koreans traditionally eat samgyetang during sambok, the hottest stretch of summer, which ended in August 2026.
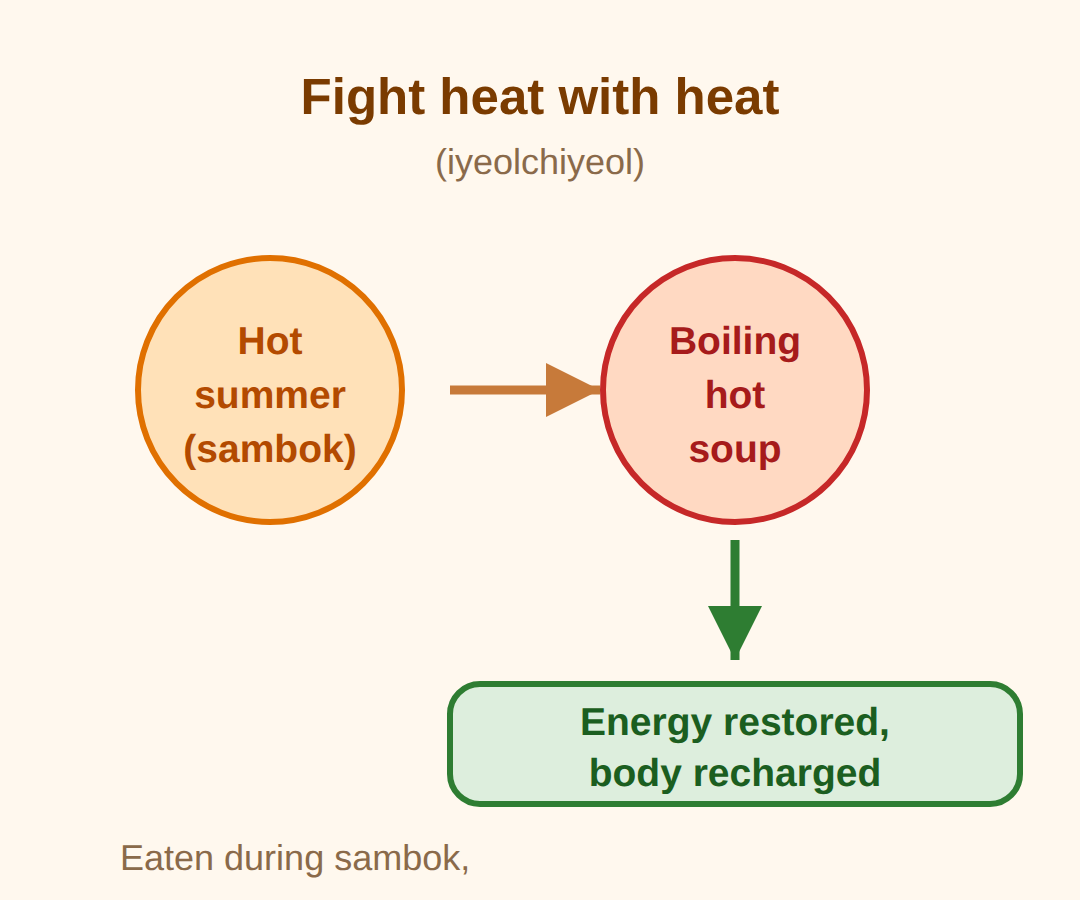
    The custom rests on iyeolchiyeol, usually translated as fighting heat with heat: a boiling soup is believed to restore energy drained by the heat.
    The 2026 sambok period ended about three weeks before this writing, and the dish is also cooked year-round by anyone who wants a one-pot chicken dinner.
    Either way, the cooking problem is the same: the ingredients are easy to name and hard to find outside Korea.

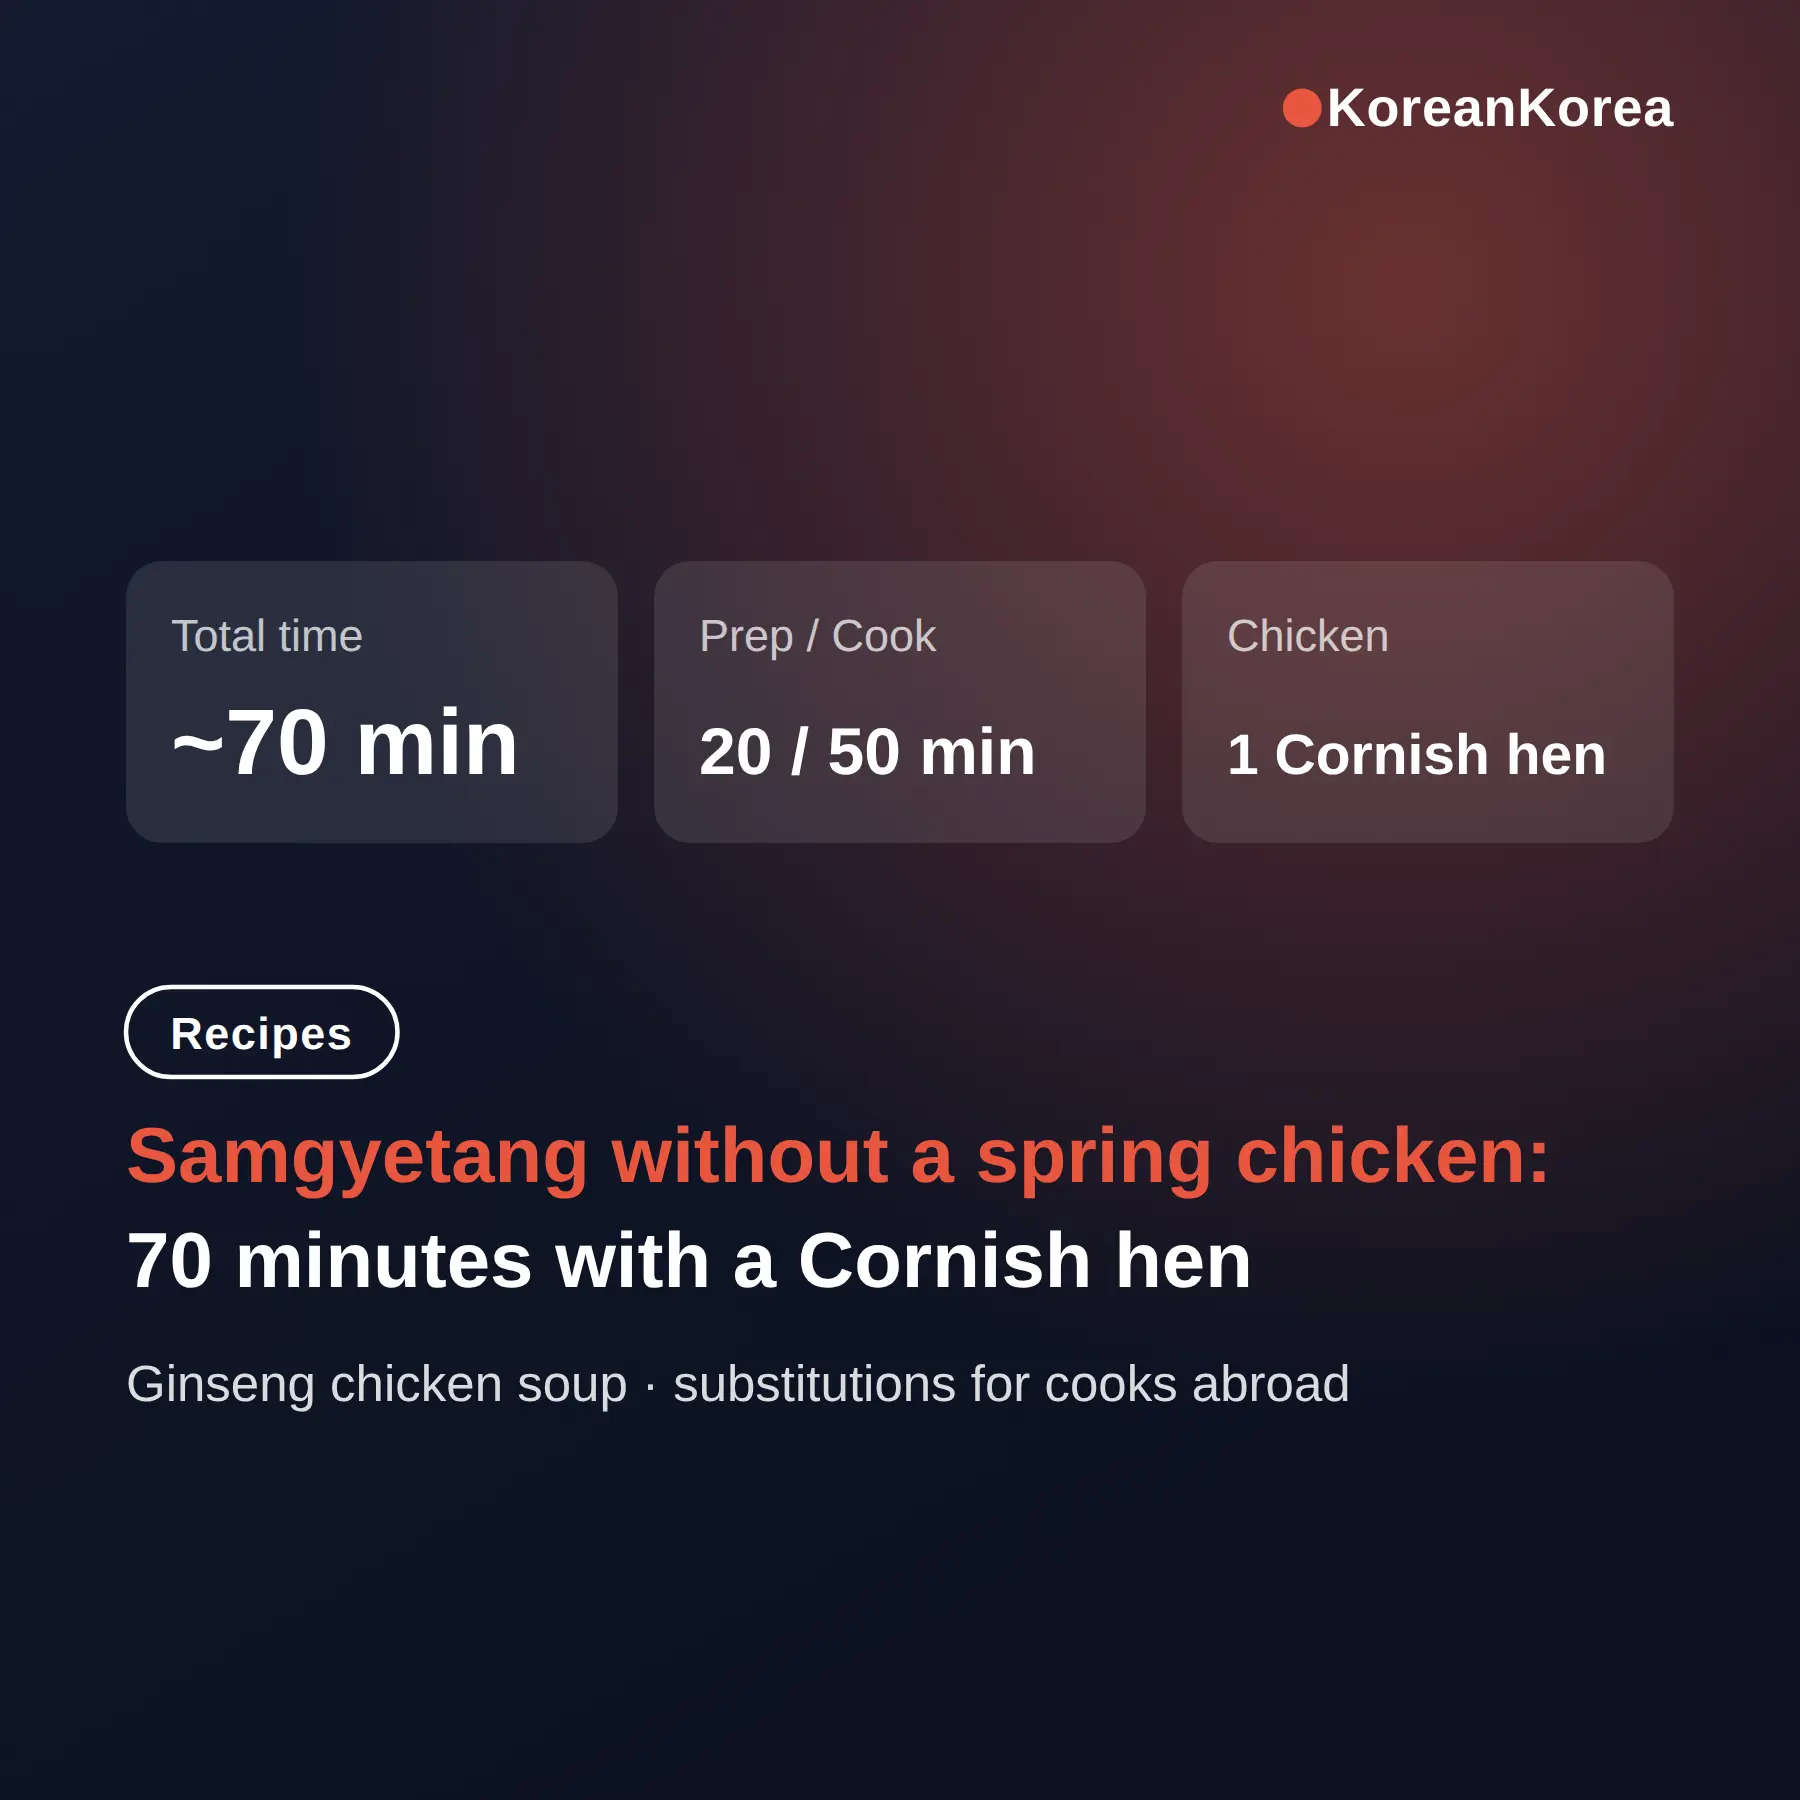
    Prep 20 min, cook 50 min (~70 min total) Moderate — stuffing and sealing the bird takes practice
    Servings Key substitutions
    1 Cornish hen serves 1-2 Cornish hen or 2-3 lb whole chicken; dried American ginseng or a market herb kit
    Samgyetang recipe: why hot soup in hot weather (iyeolchiyeol)
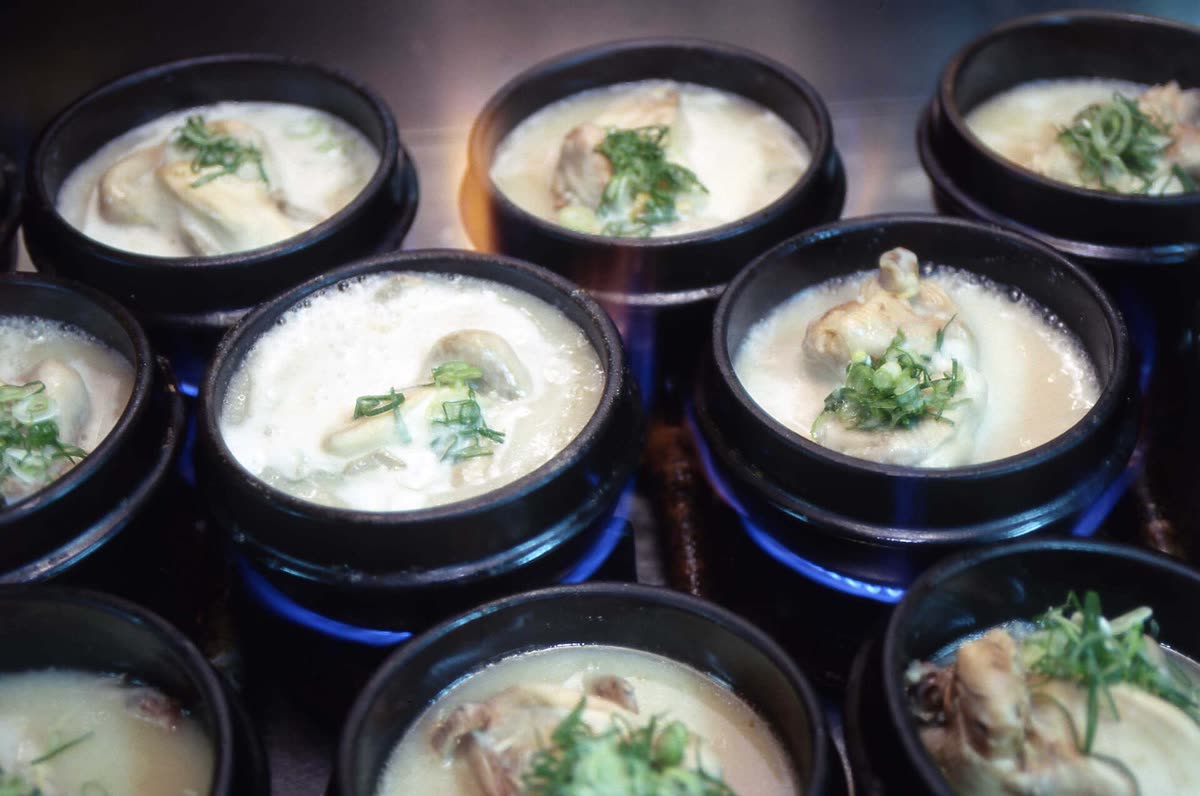
    Ginseng Chicken Soup — Samgyetang recipe: why hot soup in hot weather (iyeolchiyeol)
    Photo: Ginseng Chicken Soup by Korea.net / Korean Culture and Information Service — CC BY-SA 2.0 (Wikimedia Commons)

    Which chicken to buy when there is no spring chicken

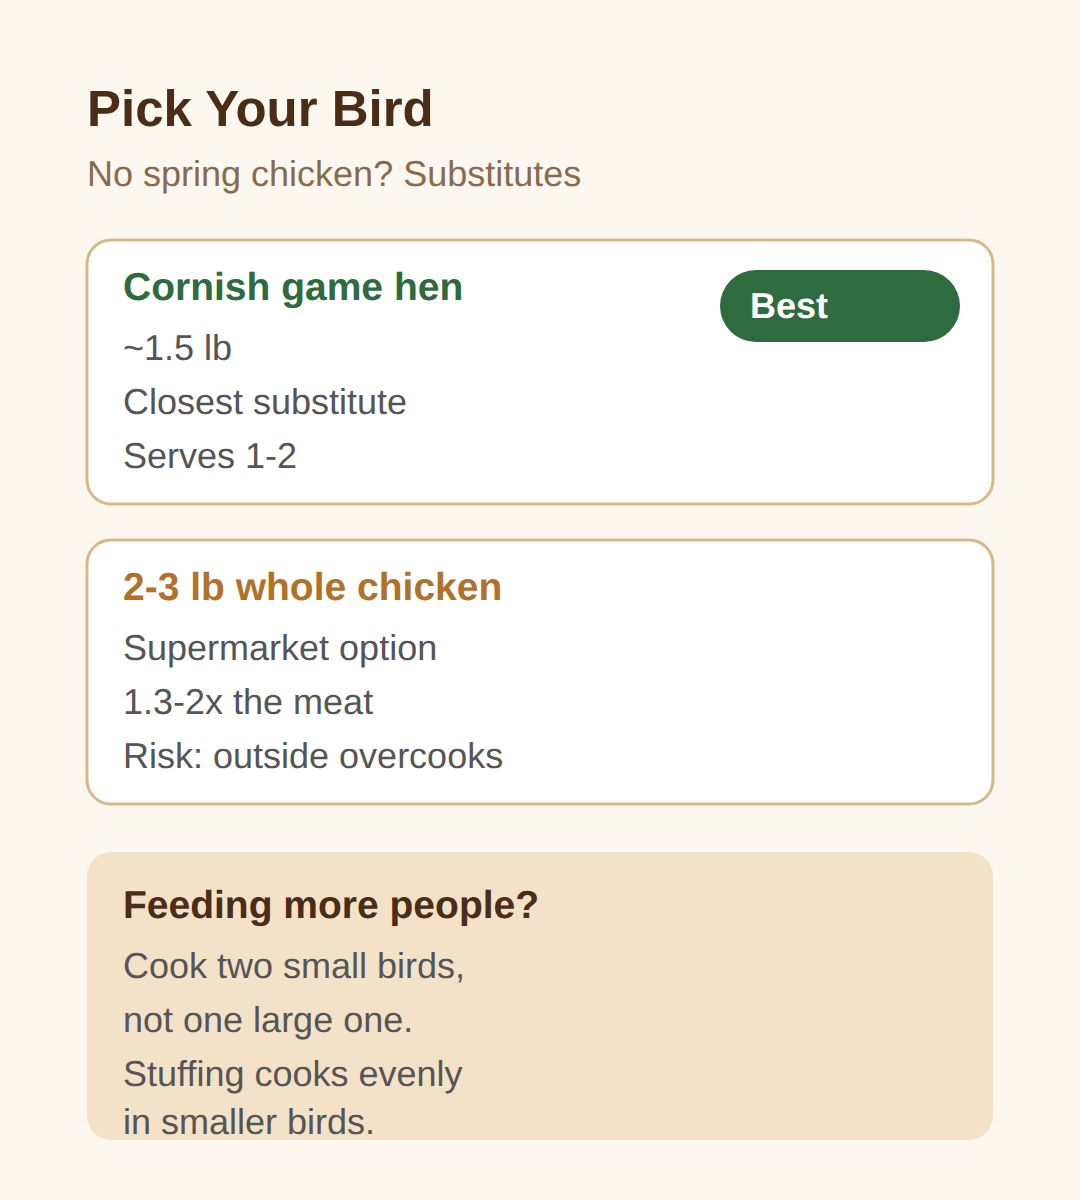
    A traditional samgyetang uses a young chicken around 1 lb, and that size rarely appears on supermarket shelves abroad.
    A 2-3 lb whole chicken works, though it holds roughly 1.3 to 2 times the meat of the standard 1.5 lb Cornish hen.
    Cornish game hens are the closest substitute, and one hen of about 1.5 lb serves one to two people.
    If more people are eating, cook two small birds rather than one large one.
    A big chicken overcooks on the outside before the stuffing in the middle is done.

    Which chicken to buy when there is no spring chicken
    Moscow, Paveletskaya Plaza Feb.2025 - whole chicken 01 — Which chicken to buy when there is no spring chicken
    Photo: Moscow, Paveletskaya Plaza Feb.2025 – whole chicken 01 by Retired electrician — CC0 (Wikimedia Commons)

    Ginseng: fresh, dried, or a market kit

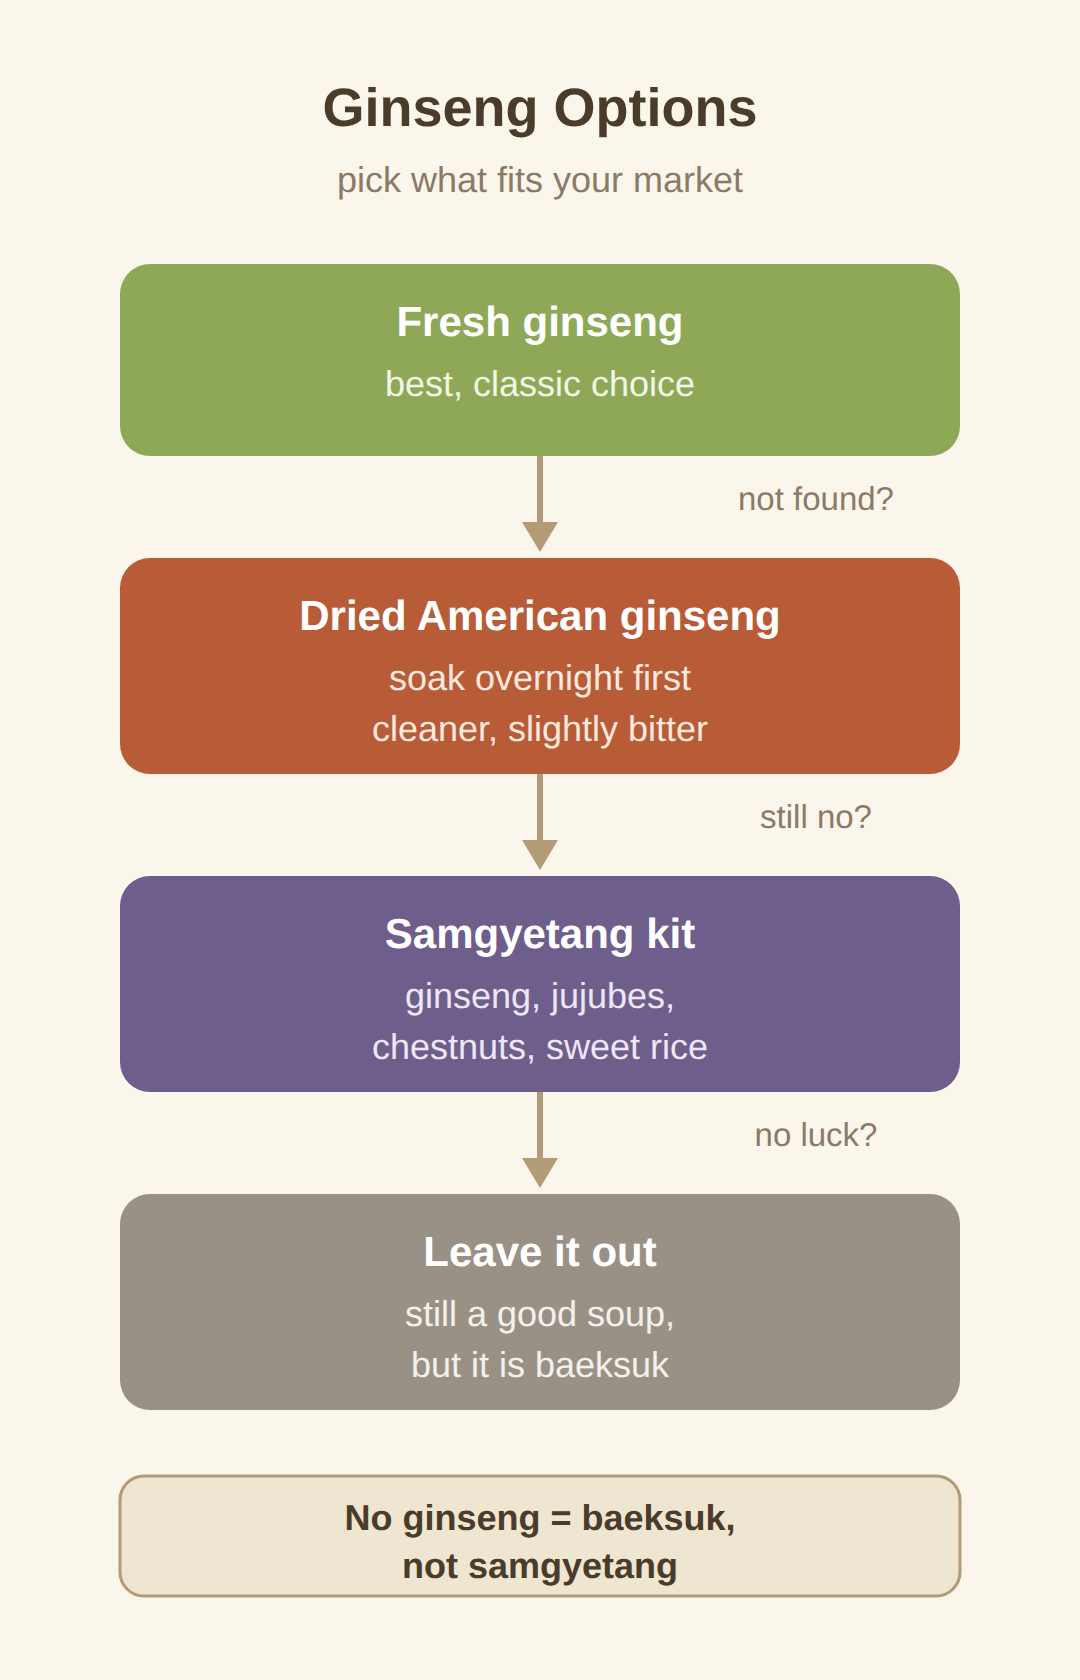
    Ginseng is the defining ingredient — the same soup without it is called baeksuk, not samgyetang.
    If fresh ginseng is unavailable, dried American ginseng works as a substitute after an overnight soak, and it gives the broth a cleaner, slightly bitter note.
    Korean markets often sell samgyetang kits with dried ginseng, jujubes, dried chestnuts and sweet rice in one packet; follow the soaking instructions on the package.
    If ginseng simply cannot be found, it can be left out entirely, and the result is still a good chicken soup under a different name.

    Ginseng: fresh, dried, or a market kit

    Stuffing the bird: sweet rice and the expansion warning

    The stuffing is about 3 tablespoons of dried sweet rice, soaked for 1 hour, plus a couple of garlic cloves and pieces of ginseng inside the cavity.
    Do not fill the cavity completely — leave about a quarter of it empty so the rice can expand while cooking.
    An overstuffed bird is the most common first-timer failure, because swollen rice can split the skin and spill into the broth.
    Keep the neck and tail attached if they are there; the neck folded into the opening helps hold the rice in.
    Seal the cavity either by cutting a small slit in the skin between one thigh and threading the other leg through, or by crossing the legs and tying them with kitchen twine.

    How much water for one Cornish hen — 5 to 6 cups and a 50-minute simmer

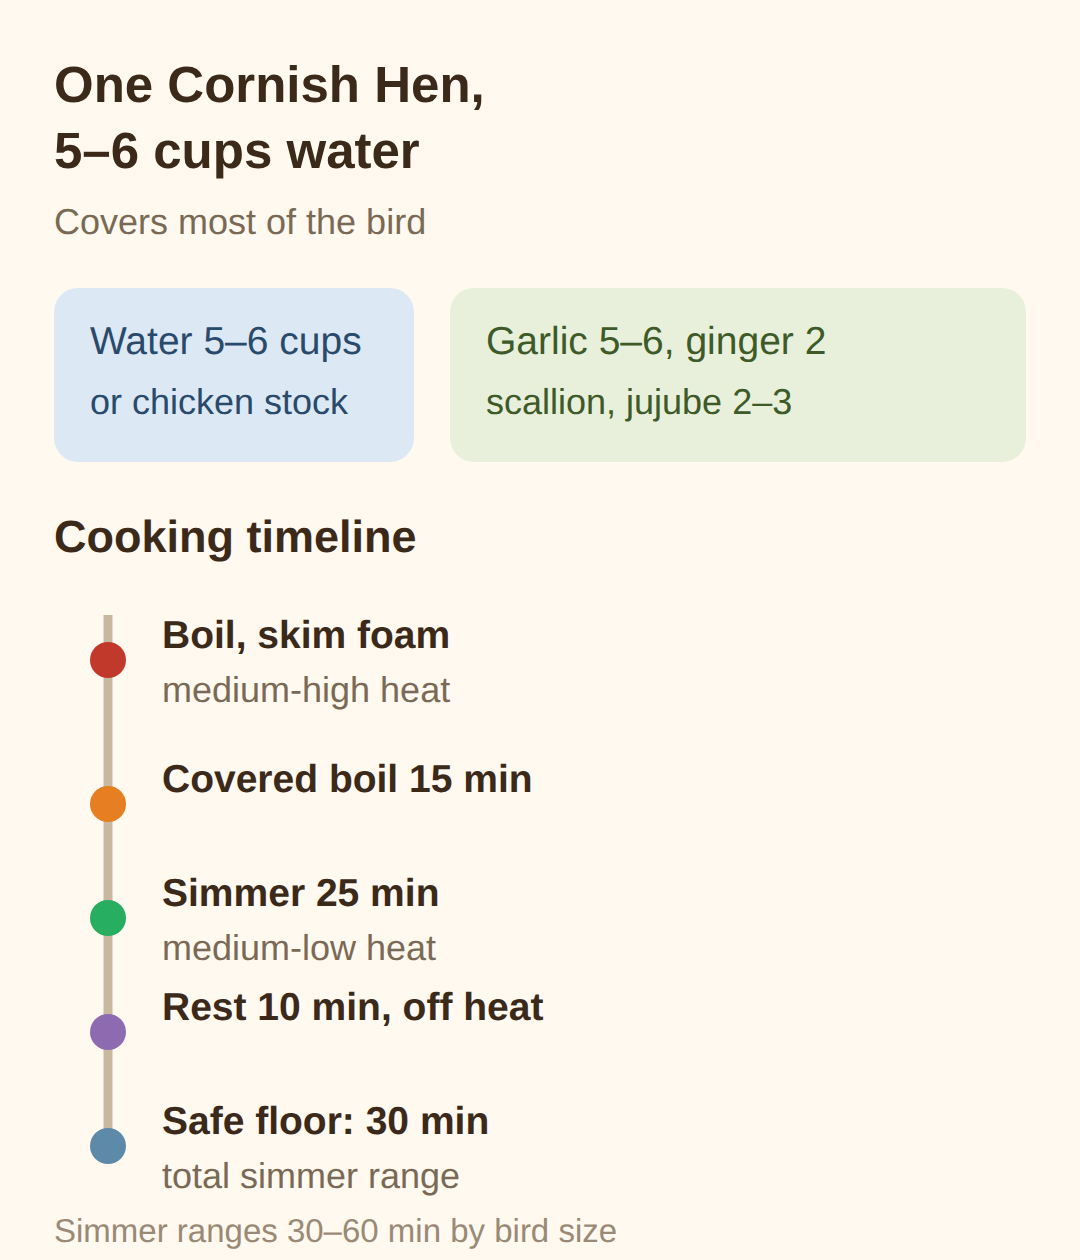
    One Cornish hen needs 5 to 6 cups of water, enough to cover most of the bird, topped up during cooking if needed.
    Into the pot go 5-6 garlic cloves, about two thin slices of ginger, the white part of a scallion, and only 2-3 jujubes, since jujubes are very sweet.
    Bring the pot to a boil over medium-high heat and skim off the foam, then boil covered for 15 minutes, drop to medium-low for about 25 minutes, and let the chicken rest in the pot 10 minutes off the heat.
    Across published recipes the gentle simmer runs 30 to 60 minutes depending on bird size, so at least 30 minutes is the safe floor.
    Starting with good chicken stock instead of water deepens the flavor, and boiling a little extra soaked sweet rice in the broth slightly thickens it and adds sweetness.

    How much water for one Cornish hen — 5 to 6 cups and a 50-minute simmer

    Seasoning happens at the table, not in the pot

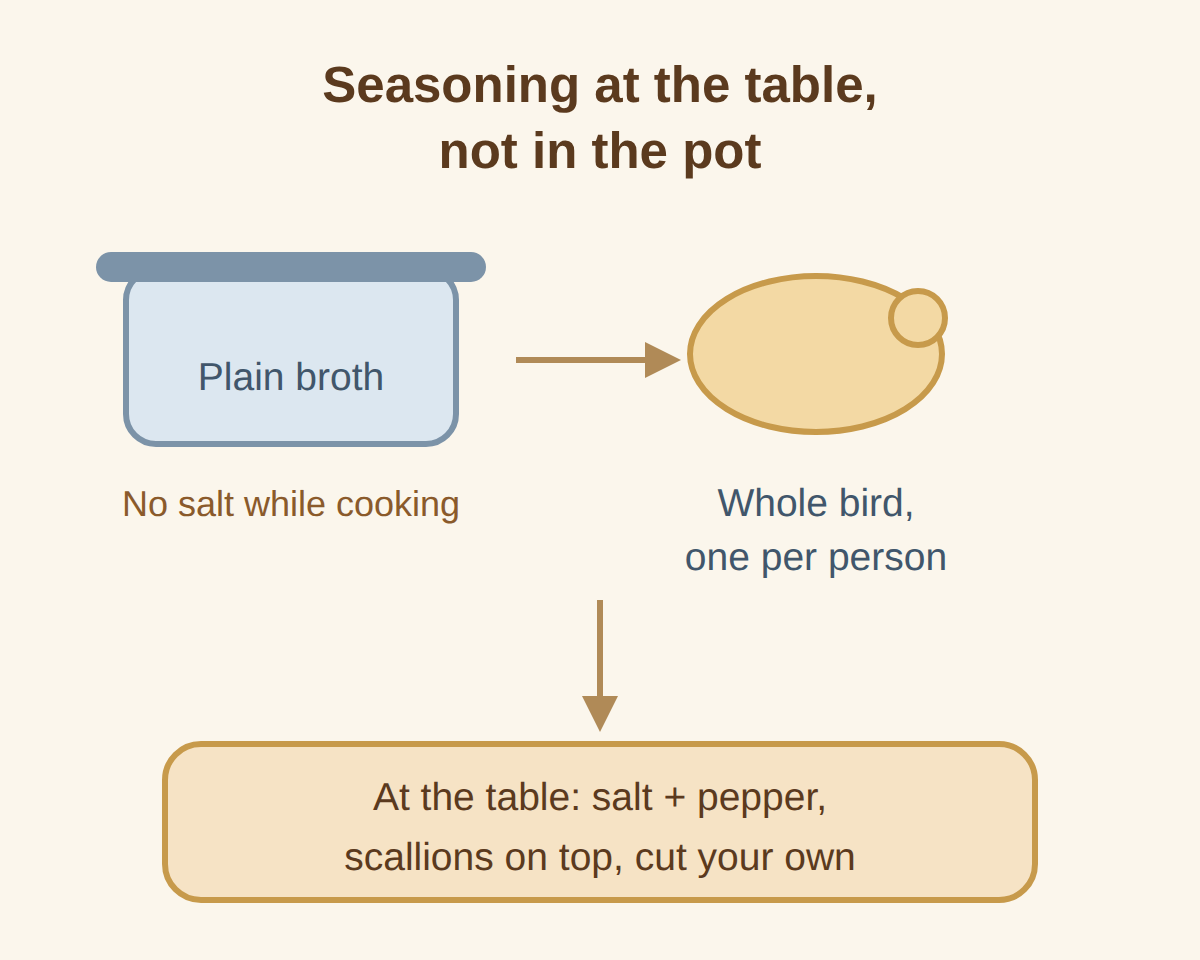
    The broth is not seasoned during cooking.
    Salt and pepper arrive on the side, and each person seasons their own bowl and dips the meat in the seasoned broth.
    Restaurants serve the whole bird uncut, one per serving, and each diner cuts it at the table.
    Chopped scallions go on top just before eating.

    Seasoning happens at the table, not in the pot

    👉 iyeolchiyeol and Korea’s hot-summer soup tradition

    👉 full Cornish hen samgyetang method

    👉 ginseng substitution and chicken-size guide

    Related posts

    📎 Kimbap Recipe: 45 Minutes, One Mat, No Special Ingredients

    Sources

    Common samgyetang mistakes to avoid

    • Overstuffed rice — leave a quarter of the cavity empty.
    • One big bird for many people — cook two small birds instead.
    • Skipping the foam-skim — the broth turns cloudy.
    • Seasoning the pot — salt belongs at the table, not in the broth.

    FAQ

    Q. Why does the rice burst when I put in too much?

    Sweet rice expands as it cooks. A fully packed cavity has no room left, so the swelling rice pushes the skin open and spills into the broth. Filling about three-quarters of the cavity prevents it.

    Q. Can I skip ginseng?

    Yes. Without ginseng the same chicken-and-rice soup is called baeksuk, and it is still a complete dish on its own.

    Q. How long should it simmer?

    Recipes range from 30 to 60 minutes depending on the size of the bird. A gentle simmer of at least 30 minutes, then a 10-minute rest off the heat, covers a standard Cornish hen.

    Baeksuk and dak gomtang, two simpler whole-chicken soups, make natural next steps once this version works.

    #samgyetangrecipe #ginsengchickensoup #Cornishhen #sweetrice #Koreansoup #baeksuk #Koreansummerfood #driedginseng

  • Kimbap Recipe: 45 Minutes, One Mat, No Special Ingredients

    Kimbap Recipe: 45 Minutes, One Mat, No Special Ingredients

    Kimbap is cooked rice and fillings rolled in dried seaweed and sliced, and it is the food Korea packs for holiday road trips.
    Chuseok falls on September 25, 2026, and families load it into coolers for the drive to relatives.
    This guide covers the rice seasoning, the classic fillings, and the substitutions that work when Korean ingredients are hard to find.

    Contents

    1. Kimbap Rice: Sesame Oil and Salt, Not Sushi Vinegar
    2. Fillings: The Classic Five and the Egg-vs-Bulgogi Swap
    3. Rolling Step by Step: The First Fold Is the Whole Game
    4. Packing Kimbap for the Road: The Two-Hour Rule

    Kimbap Rice: Sesame Oil and Salt, Not Sushi Vinegar

    The rice is where most first-timers go wrong.
    Kimbap rice is seasoned with sesame oil and salt, while sushi rice uses vinegar and sugar, so a sushi-style shortcut changes the taste immediately.
    Use short-grain Korean or Japanese-style rice; long-grain rice does not stick, and the roll falls apart.
    A common starting point is about 1 tablespoon of sesame oil and 1/2 teaspoon of salt per 2 cups of cooked rice.
    One cup of uncooked short-grain rice yields roughly 2 rolls.
    Spread the rice in a thin layer and leave about 2 cm of bare seaweed at the top edge.
    Brush that bare edge with water, or press in a few sesame-oil-dotted rice grains, then close the seam and rest the roll seam-side down.
    Fill and roll while the rice is warm rather than hot, since heat wilts the seaweed.
    Pre-roasted seaweed sheets work straight from the package, and standard sheets measure about 20 by 18–20 cm.
    Any pot works for the rice; a rice cooker is not required.

    Prep + cook time About 45 minutes
    Equipment One bamboo mat (or a towel and plastic wrap)
    Rice per 2 rolls 1 cup uncooked short-grain rice
    Pieces per roll 6–8
    Room-temperature limit 2 hours (less on hot days)

    Fillings: The Classic Five and the Egg-vs-Bulgogi Swap

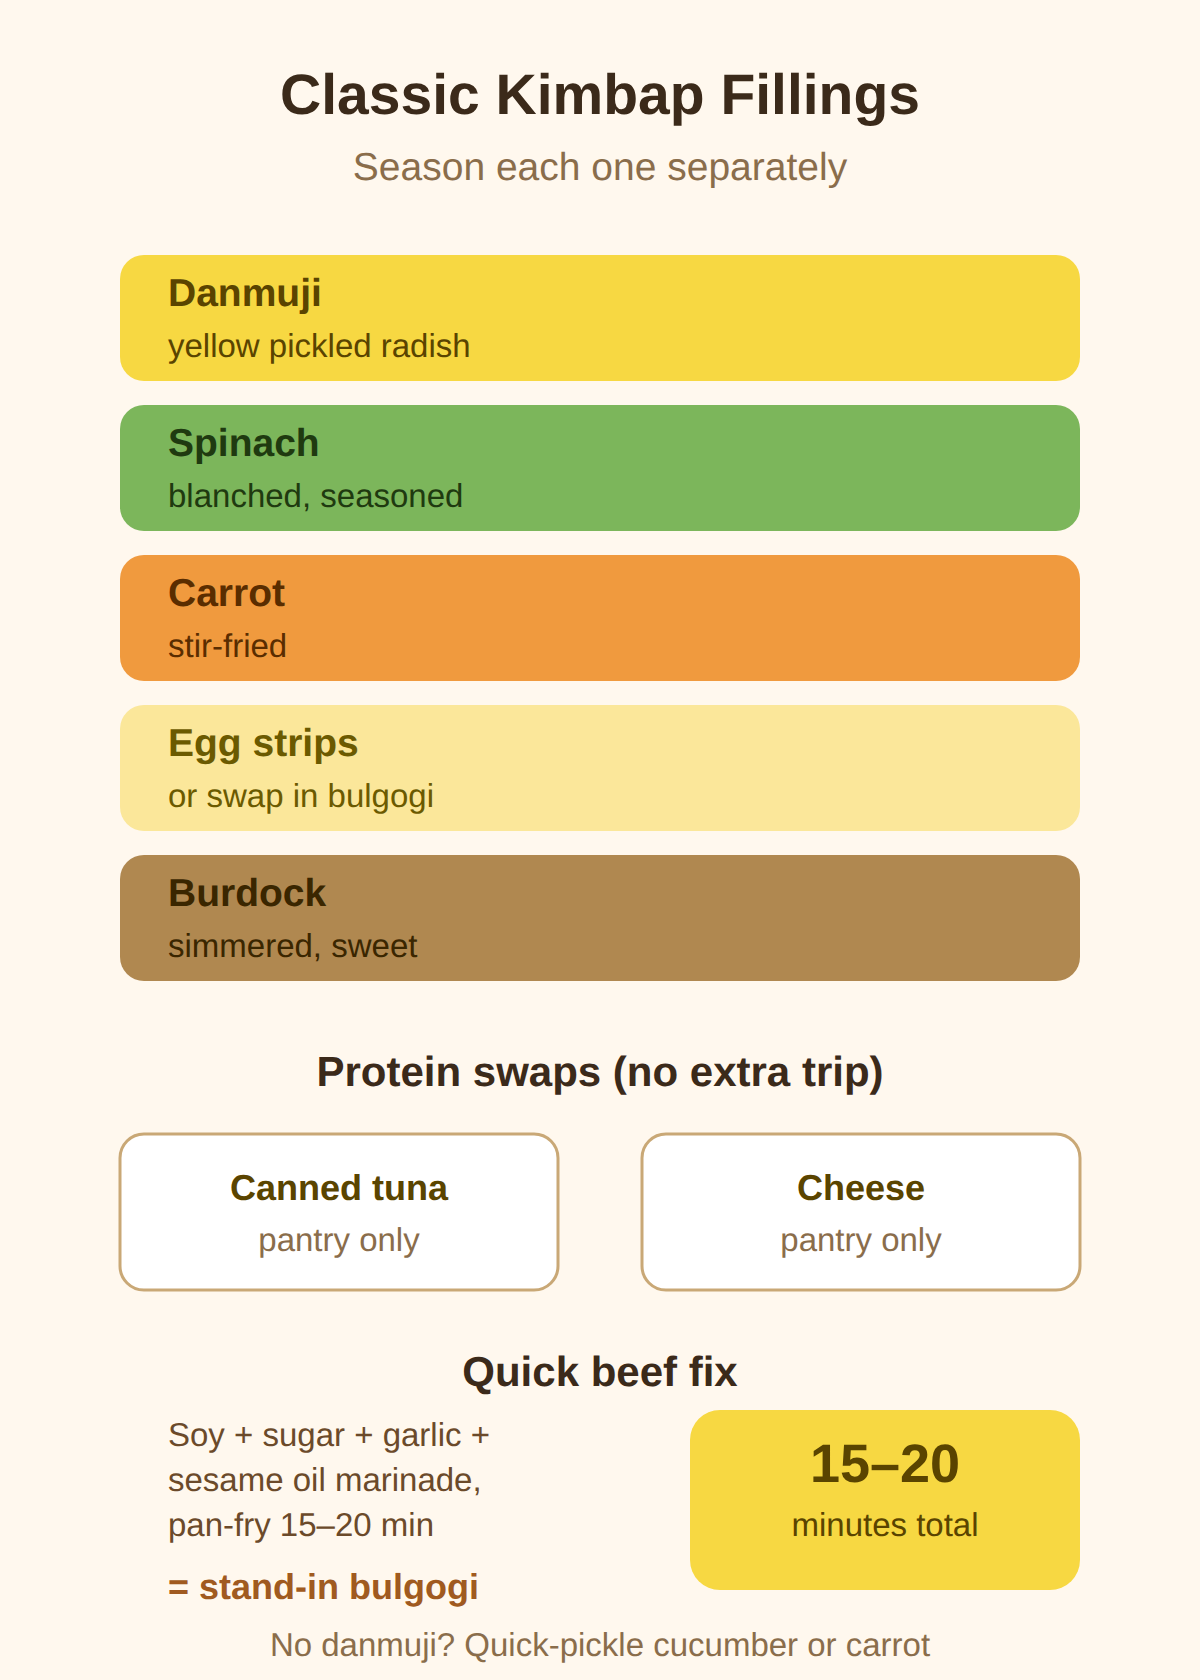
    Classic kimbap fillings are yellow pickled radish (danmuji), spinach, carrot, egg strips, and burdock, with bulgogi, ham, tuna, or cheese as the protein.
    Each filling is cooked and seasoned on its own before rolling, not mixed into one pan.
    When beef is hard to find, a quick marinade of soy sauce, sugar, garlic, and sesame oil on thin-sliced beef replaces proper bulgogi in a 15–20 minute pan-fry.
    Canned tuna and cheese are the two variants that show up most in overseas easy-kimbap tutorials, and both need no extra shopping.
    If danmuji is unavailable, quick-pickled cucumber or carrot in vinegar stands in; a vinegar-sugar-salt brine with a pinch of turmeric copies the yellow color in a few hours.
    Roasted gim, danmuji, and Korean sesame oil are stocked at Korean or Asian grocers abroad, and plain supermarkets carry toasted seaweed snacks as a fallback.

    Fillings: The Classic Five and the Egg-vs-Bulgogi Swap

    Rolling Step by Step: The First Fold Is the Whole Game

    Most first-timer failures come down to three things: overly wet rice, overfilled rolls, and a dull knife that tears the sheet on the first cut.
    Keep the rice layer thin, place fillings in a line across the lower third, and lift the mat to make the first fold snug before rolling the rest.
    A bamboo mat is standard, but a kitchen towel wrapped in plastic wrap, or parchment paper, works in a pinch.
    Cut with a sharp knife wiped with a wet or oiled cloth between cuts so the rice does not stick, and one roll yields 6–8 pieces.
    One roll is roughly a light meal for one person or a shared snack for two.

    Packing Kimbap for the Road: The Two-Hour Rule

    Kimbab travels well, which is why it is the default road-trip food, but cooked fillings only is the safe choice for hot-weather trips.
    Keep packed rolls under 2 hours at room temperature, and less on hot days.
    Wrap each roll separately and add an ice pack for the drive.
    Refrigeration hardens the rice, so for short trips the surface gets a light brush of sesame oil and the rolls stay out of the fridge.

    Sources

    Substitutions That Actually Work

    • No Korean sesame oil: toasted-sesame oil, or neutral oil plus toasted sesame seeds, approximates the aroma; plain vegetable oil loses the signature scent.
    • No bamboo mat: a plastic-wrapped kitchen towel or parchment paper rolls the same roll.
    • No beef: folded thin egg omelet or canned tuna carries the roll, and seasoned pan-fried tofu makes it vegan with the rest of the process unchanged.
    • Gluten-free: use tamari in the beef marinade and check the danmuji label, since some commercial pickled radish contains wheat-based additives.

    FAQ

    Q. How is kimbap different from a sushi roll?

    The rice is the main difference. Kimbap rice is seasoned with sesame oil and salt, while sushi rice uses vinegar and sugar, and kimbap leans on cooked fillings rather than raw fish.

    Q. Why does my kimbap fall apart when I cut it?

    The usual causes are overly wet rice, too much filling, and a dull or dry knife. Wipe the blade with a wet or oiled cloth between cuts.

    Q. Can I make kimbap ahead for a trip?

    Fillings can be cooked the day before, but the rice is best made fresh on rolling day. Packed rolls stay safe at room temperature for about 2 hours.

    Make the rice first, cook the fillings while it steams, and season the rice last so it is still warm when the first fold goes down.

    Cover photo: Korean.food-Kimbap-03 by jqn (a flickr user) — CC BY-SA 2.0

    #kimbaprecipe #gimbap #koreanseaweedricerolls #kimbapfillings #kimbapvssushi #koreanpicnicfood #chuseokfood #koreanrecipes
  • Samgyetang Recipe: Fight Summer Heat With a Boiling Soup, Not Ice

    Samgyetang Recipe: Fight Summer Heat With a Boiling Soup, Not Ice

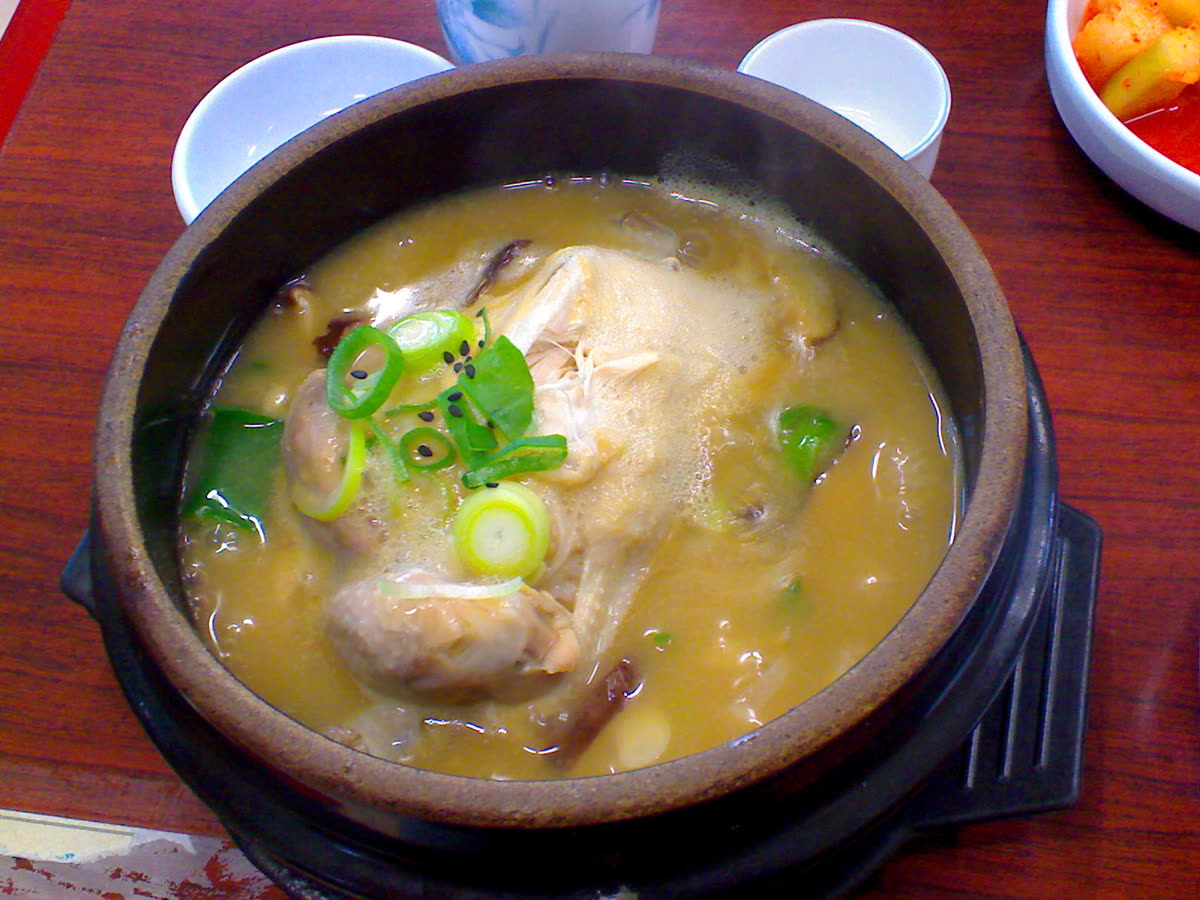
    Samgyetang is a whole young chicken stuffed with sweet rice and simmered with ginseng, garlic, and jujubes until the broth turns milky.
    Koreans eat it on the hottest days of summer, and the reasons why explain how the dish is cooked.
    This post walks through the rice-stuffing rule, the simmer timing, and the substitutions that work when fresh ginseng or small chickens are hard to find.
    A few numbers up front, before the steps:

    Contents

    1. Samgyetang recipe: what the name means, and why it is eaten in the worst heat
    2. Ingredients and substitutions for cooks outside Korea
    3. Stuffing the rice and sealing the cavity
    4. Cooking: the simmer, and how to thicken the broth
    5. Baek Jong-won’s pressure-cooker variation
    6. Seasoning and serving: salt at the table, not in the pot

    Samgyetang recipe: what the name means, and why it is eaten in the worst heat

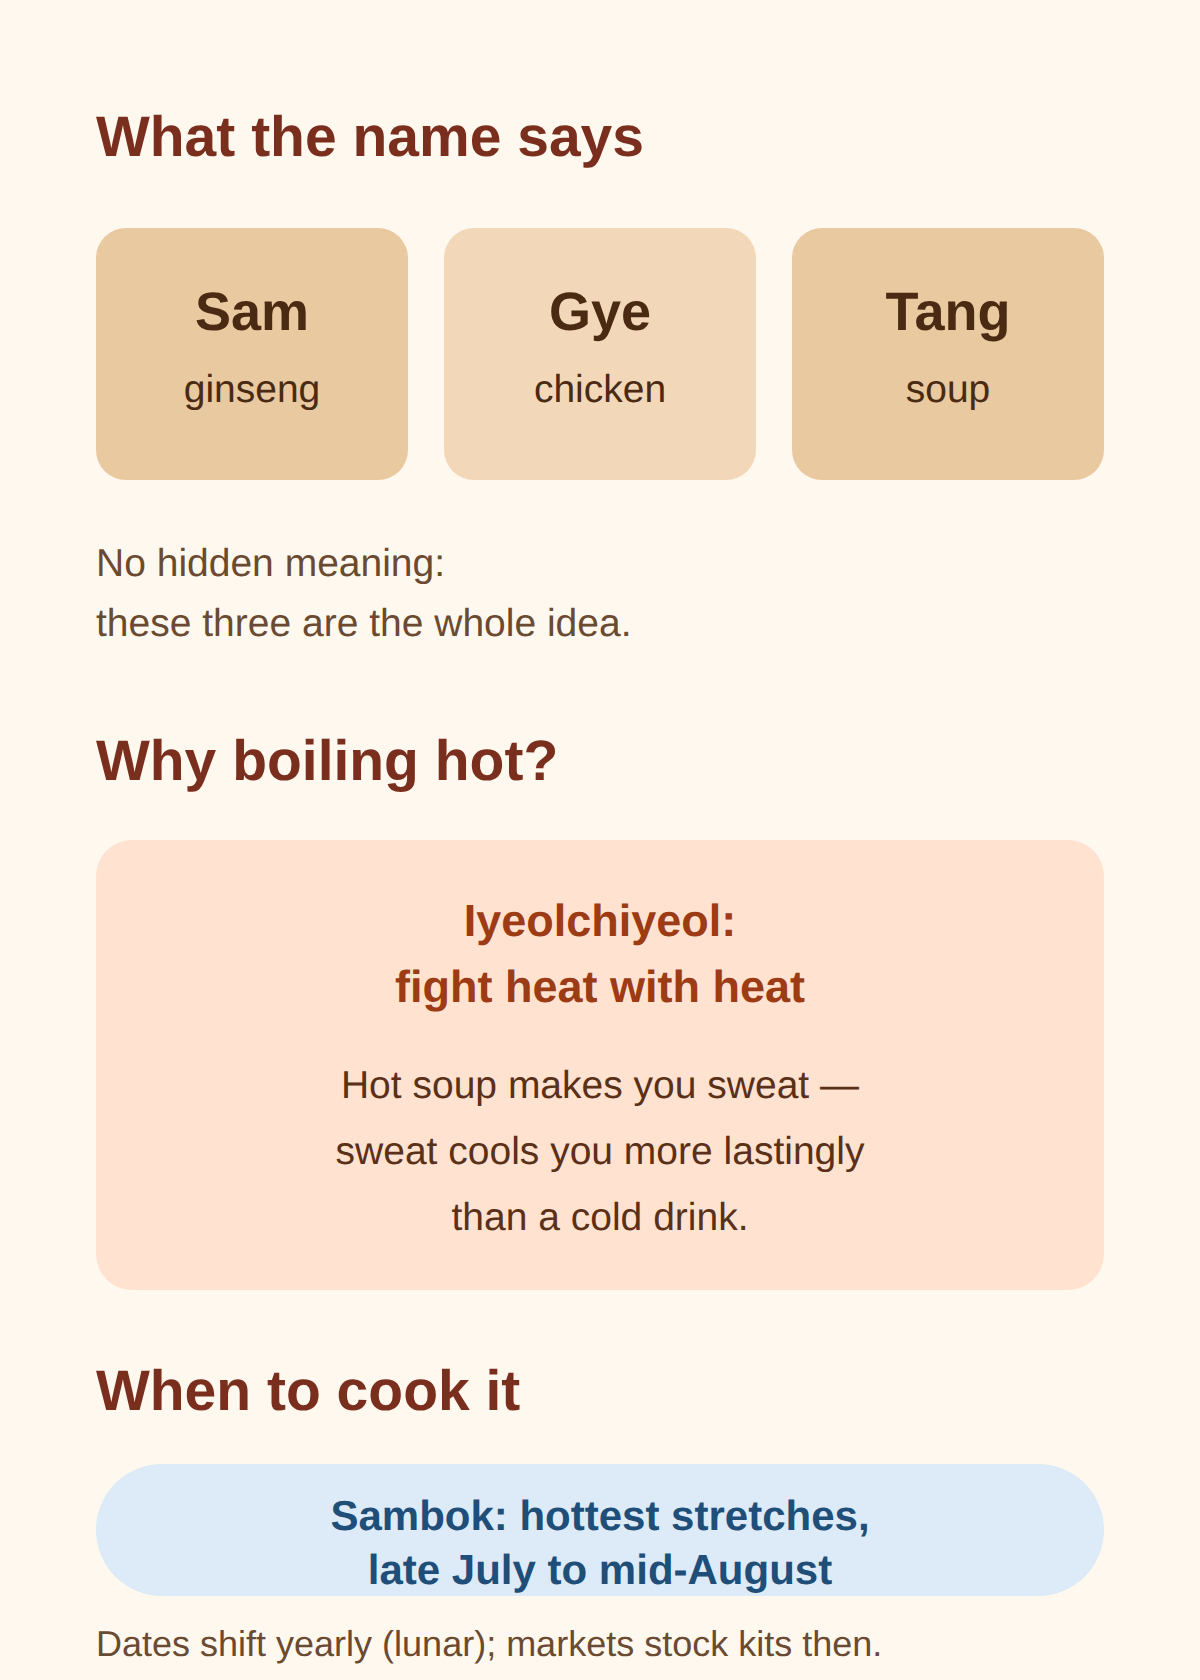
    The name spells out the dish: sam (삼) is ginseng, gye (계) is chicken, and tang (탕) is soup.
    There is no hidden second meaning — the three ingredients are the whole idea.
    The timing looks strange at first.
    On the sambok days, the three hottest stretches of the Korean summer, people line up for a soup served boiling hot.
    The reasoning is a Korean idea called iyeolchiyeol — fight heat with heat.
    A scorching soup makes the body sweat, and that sweat cools it down more lastingly than a cold drink would.
    For a first-time cook, this timing matters in a practical way.
    Fresh Korean ginseng is at its best at summer markets, and a samgyetang kit — dried ginseng, jujubes, chestnuts, and sweet rice in one packet — is easy to find exactly when the dish is in season.
    A note on the sambok calendar: the exact dates shift every year because they follow the lunar calendar, so they cannot be listed as fixed days here.
    For most readers the practical marker is simply ‘late July to mid-August’, which is when Korean groceries stock the ingredients.

    Servings 1 whole chicken or Cornish hen serves 2
    Glutinous rice About 2–2.5 tbsp per pound of bird, soaked 30–60 min
    Water 5–6 cups, enough to cover most of the chicken
    Simmer 30–40 minutes, longer for a larger bird
    Seasoning None in the pot — salt and pepper at the table
    Samgyetang recipe: what the name means, and why it is eaten in the worst heat
    File:Korean soup-Samgyetang-09.jpg — Samgyetang recipe: what the name means, and why it is eaten in the worst heat
    Photo: File:Korean soup-Samgyetang-09.jpg by by karendotcom127 — CC BY 2.0 (Openverse)

    Ingredients and substitutions for cooks outside Korea

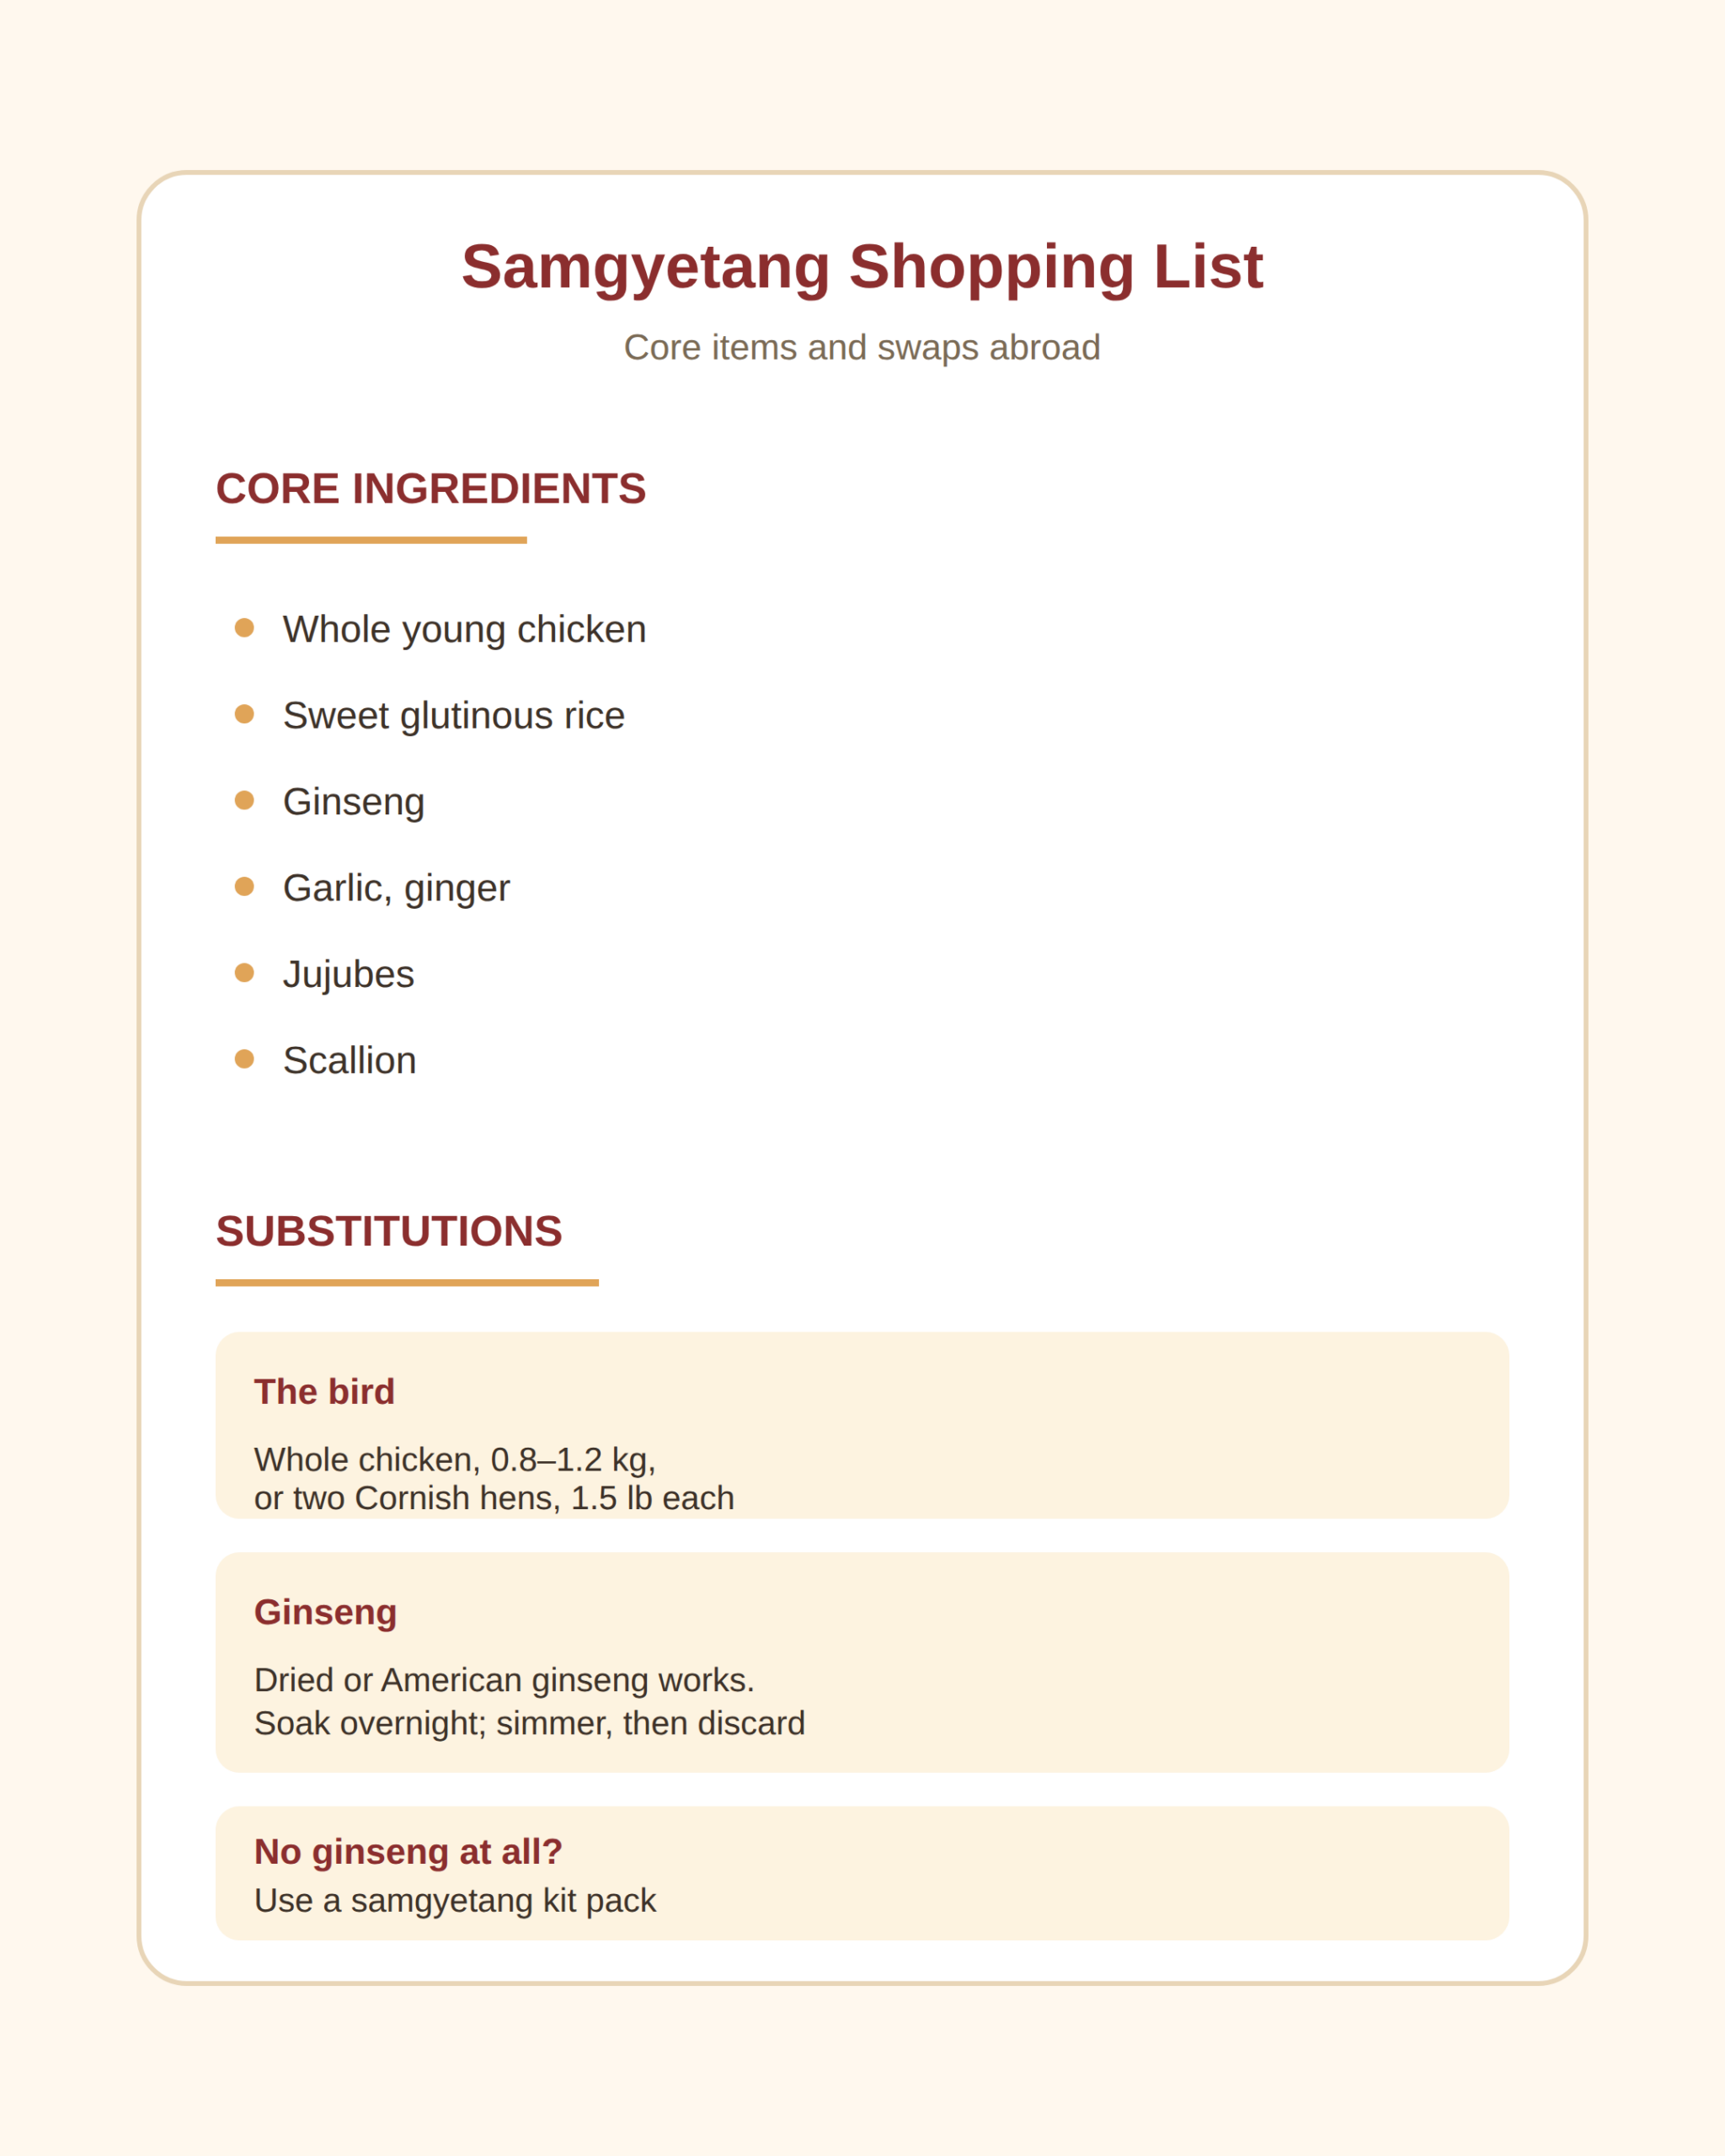
    The core list is short: one whole young chicken, sweet (glutinous) rice, ginseng, garlic, ginger, jujubes, and scallion.
    The substitutions are what decide whether the dish works abroad.
    For the bird, a 0.8–1.2 kg whole chicken or two Cornish game hens of about 1.5 lb each both work.
    A single Cornish hen is the classic Korean single serving — one small bird, one clay pot, one diner.
    For the ginseng, dried ginseng replaces fresh, and dried American ginseng is a workable overseas stand-in.
    Soak it overnight to soften it before it goes into the pot.
    One thing dried ginseng will not do is turn tender.
    Even after a long simmer it stays tough and fibrous, so the practical approach is to let it infuse the broth, then discard it before serving.
    Keep it in the pot as a flavor source, not an ingredient to eat.
    If even dried ginseng is out of reach, the samgyetang kit route closes the gap.
    Korean markets sell packets containing the dried aromatics, and following the package instructions (including any soaking) covers the seasoning base.

    Ingredients and substitutions for cooks outside Korea

    Stuffing the rice and sealing the cavity

    The rice is the part where most first attempts go wrong, and the failure mode is physical: glutinous rice expands as it cooks.
    If the cavity is packed full, the swelling rice can split the bird open in the pot.
    The rule is to fill the cavity only about three-quarters full, leaving roughly a quarter of it empty.
    Two ratios from established recipes land in the same range: 3 tablespoons of soaked rice for a 1.5 lb Cornish hen (Korean Bapsang), and 5 tablespoons (60 g) for a 1.7–2.3 lb whole chicken (Beyond Kimchee).
    That works out to roughly 2 to 2.5 tablespoons of soaked rice per pound of bird.
    The rice needs rinsing and at least 30 minutes of soaking, up to an hour, before it goes in.
    Dried rice measures bigger by volume after soaking — 3 tablespoons dry becomes about 4 tablespoons soaked — so measure after soaking, not before.
    To keep the rice inside during the simmer, there are two standard moves.
    Thread one leg through a small cut in the thick skin near the opposite thigh, or simply cross the legs and tie them with kitchen twine.
    If the neck and tail are still attached, leave them on: folding the neck into the cavity helps seal the opening.

    Cooking: the simmer, and how to thicken the broth

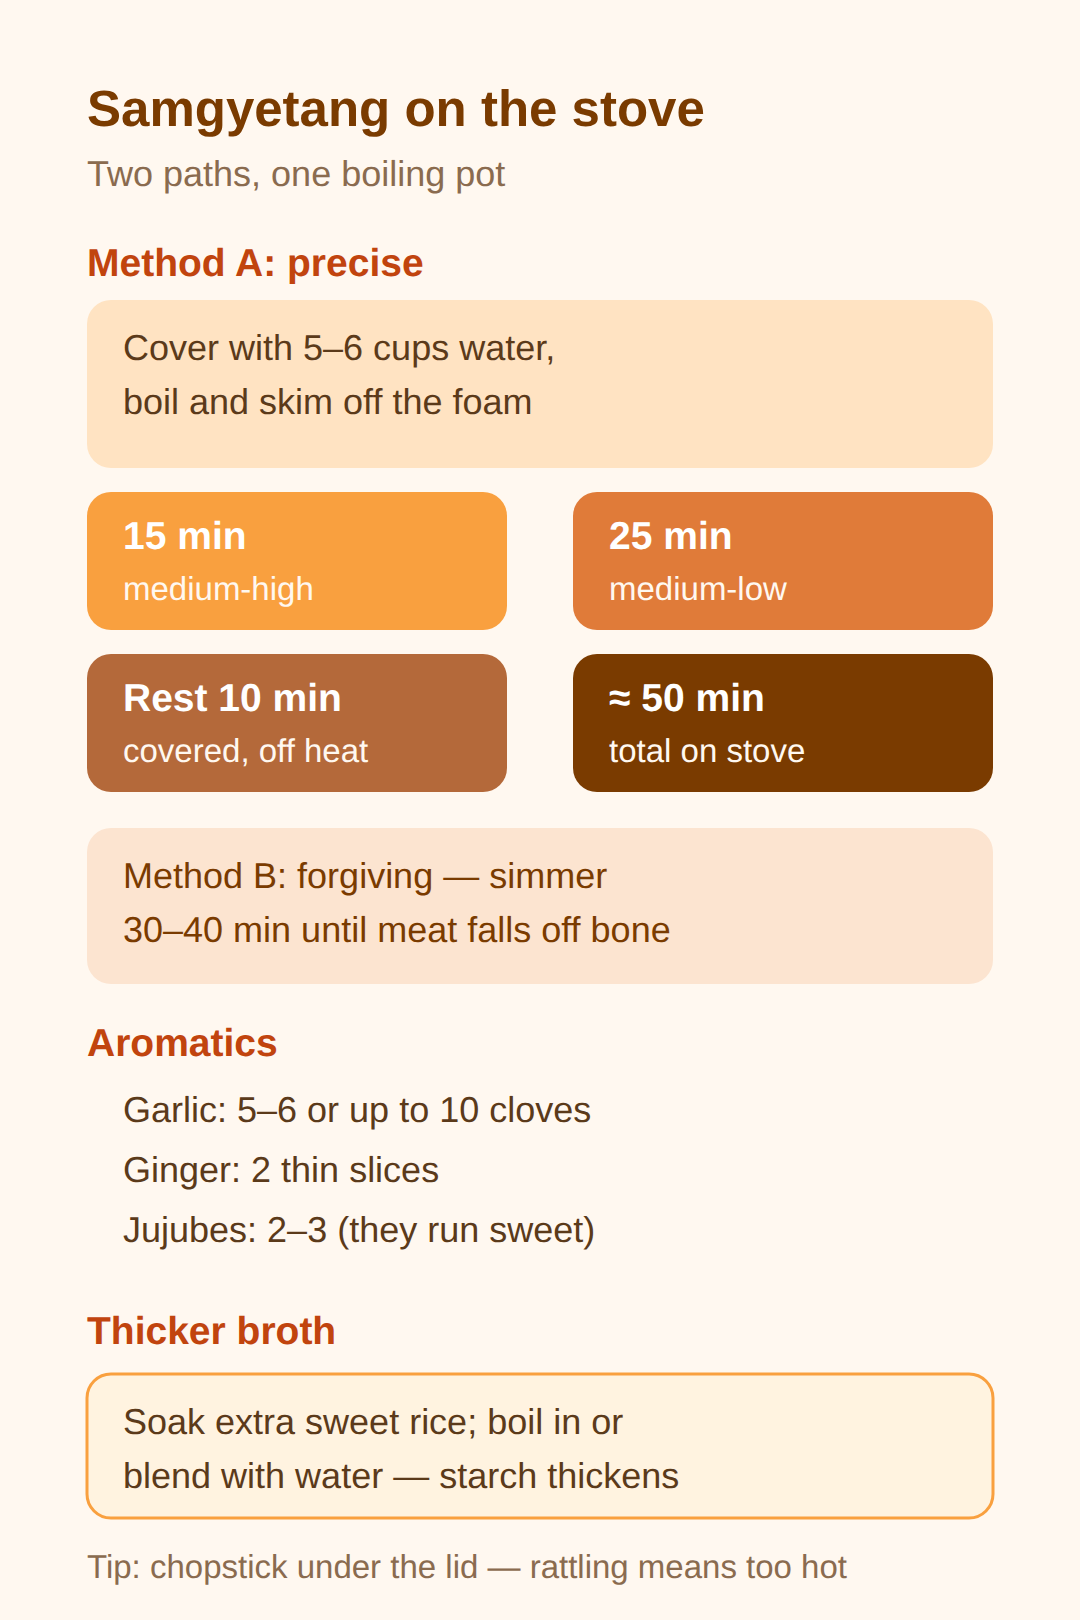
    One stovetop method, adapted from Korean Bapsang: cover the chicken with 5–6 cups of water, bring it to a boil and skim off the foam, then boil 15 minutes on medium-high.
    Turn down to medium-low for 25 minutes, then let the whole pot rest, covered and off the heat, for about 10 minutes before serving.
    Total time on the stove lands near 50 minutes.
    A second approach runs longer: simmer 30–40 minutes until the meat falls off the bone, stretching toward the high end for a larger bird.
    Both paths reach the same place; the first is more precise, the second more forgiving.
    Keep the pot at a steady simmer with the lid on, adjusting the heat if it boils too hard.
    Garlic is a judgment call, not a fixed number.
    Recipes run from 5–6 cloves (Korean Bapsang) to 10 cloves split between the cavity and the broth (Beyond Kimchee).
    Add two thin slices of ginger alongside the garlic and 2–3 jujubes for sweetness — jujubes run sweet, so more than a few takes over the pot.
    For a creamier, thicker broth, there is a trick worth knowing: soak extra sweet rice beyond the stuffing amount, then either boil it straight in the broth or blend it with a little water before adding.
    The released starch thickens the soup and adds a faint sweetness.
    Cooking the extra rice and herbs in a mesh bag keeps the broth clean while still gaining the flavor.

    Cooking: the simmer, and how to thicken the broth

    Baek Jong-won’s pressure-cooker variation

    For cooks with a pressure cooker, Baek Jong-won’s version from the Korean show Altoran is a popular shortcut.
    His ingredient list, translated: two young chickens of 400–500 g each, half a cup of glutinous rice, two ginseng roots, 4–6 jujubes, 10 garlic cloves, one scallion, and 10–12 cups of water, with abalone as a common addition.
    The steps follow the same logic as the stovetop version — stuffed cavity, aromatics, liquid — but the pressure cooker changes the cooking time.
    The exact pressure setting and cook time for this specific recipe are not documented in the sources checked for this post, so treat his published video and recipe card as the authority for the timing.

    Seasoning and serving: salt at the table, not in the pot

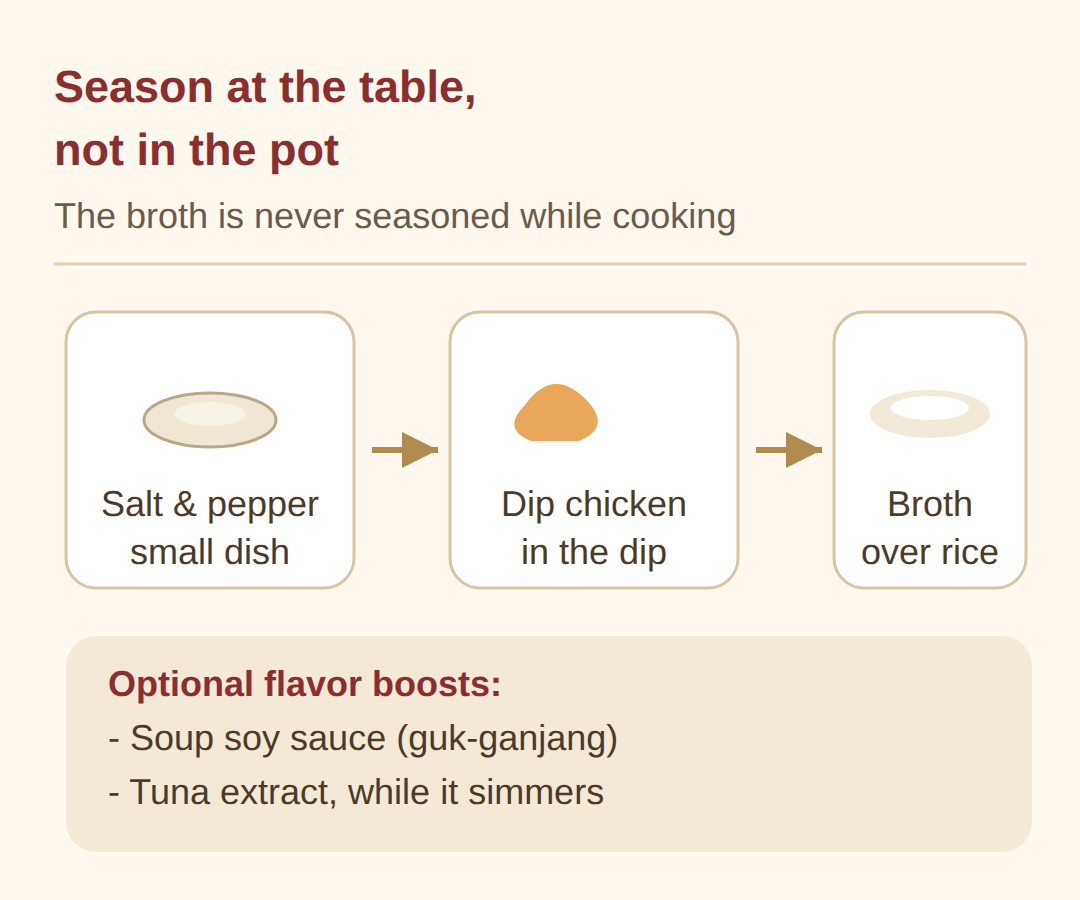
    The broth is never seasoned while it cooks.
    This is the single most counterintuitive step for first-timers, and skipping it is what separates home-style samgyetang from the restaurant version.
    Instead, each diner seasons at the table: salt and pepper in a small dish, the chicken meat dipped into it, then eaten with broth ladled over rice.
    Restaurants serve the whole uncut chicken as one portion — big enough to share between two — with chopped scallion scattered on top and the broth still boiling.
    If the homemade broth tastes thinner than a restaurant’s, that is expected: specialty restaurants build depth with a pre-made chicken stock plus a long list of herbs.
    Two optional boosts close some of the gap — a small splash of Korean soup soy sauce (guk-ganjang) and a bit of tuna extract added while the pot simmers.
    The traditional side is the balance: freshly made cabbage kimchi or well-fermented radish kimchi (kkakdugi).
    The cold, tangy crunch against the hot, herbal broth is the point of the pairing, so it is worth planning the kimchi before the chicken goes in the pot.

    Seasoning and serving: salt at the table, not in the pot

    👉 Korean Bapsang’s samgyetang walkthrough with the stovetop timing and cavity-sealing steps

    👉 Beyond Kimchee’s version with simmer times and overseas ingredient swaps

    👉 Cookpick’s breakdown of Baek Jong-won’s pressure-cooker samgyetang

    Sources

    Quick tips for first-timers

    • Soak the rice 30–60 minutes and measure after soaking, not before.
    • Fill the cavity only three-quarters full — expanding rice can split the bird.
    • Tie or thread the legs so the rice stays inside during the simmer.
    • Simmer 30–40 minutes; add time for a larger bird.
    • Discard dried ginseng before serving — it stays fibrous no matter how long it cooks.

    FAQ

    Q. Can dried ginseng replace fresh ginseng in samgyetang?

    Yes. Soak dried ginseng overnight to soften it, and use dried American ginseng if Korean ginseng is unavailable. Dried ginseng stays tough even after simmering, so use it to flavor the broth and remove it before serving.

    Q. How much room should I leave when stuffing the rice?

    Fill the cavity about three-quarters full. Glutinous rice expands as it cooks, and a packed cavity can burst the bird. A safe working ratio is 2 to 2.5 tablespoons of soaked rice per pound of bird.

    Q. Is a samgyetang kit from a Korean market okay, or do I need fresh herbs?

    A kit is fine. Most packets contain dried ginseng, jujubes, dried chestnuts, and sweet rice. Follow the package instructions, including any soaking, and treat it as a complete substitute for the loose aromatics.

    Q. Should I salt the broth while it cooks?

    No. The broth is left unseasoned in the pot, and each diner seasons their own bowl with salt and pepper at the table.

    Try it on the next sambok day — make a pot, season at the table, and enjoy the way the rice turns out.

    Cover photo: Chicken and mushroom soup with ginseng extract by ProjectManhattan — CC BY-SA 3.0

    #samgyetangrecipe #koreanginsengchickensoup #koreansummerfood #glutinousricestuffing #cornishhenrecipe #koreanhomecooking #iyeolchiyeol